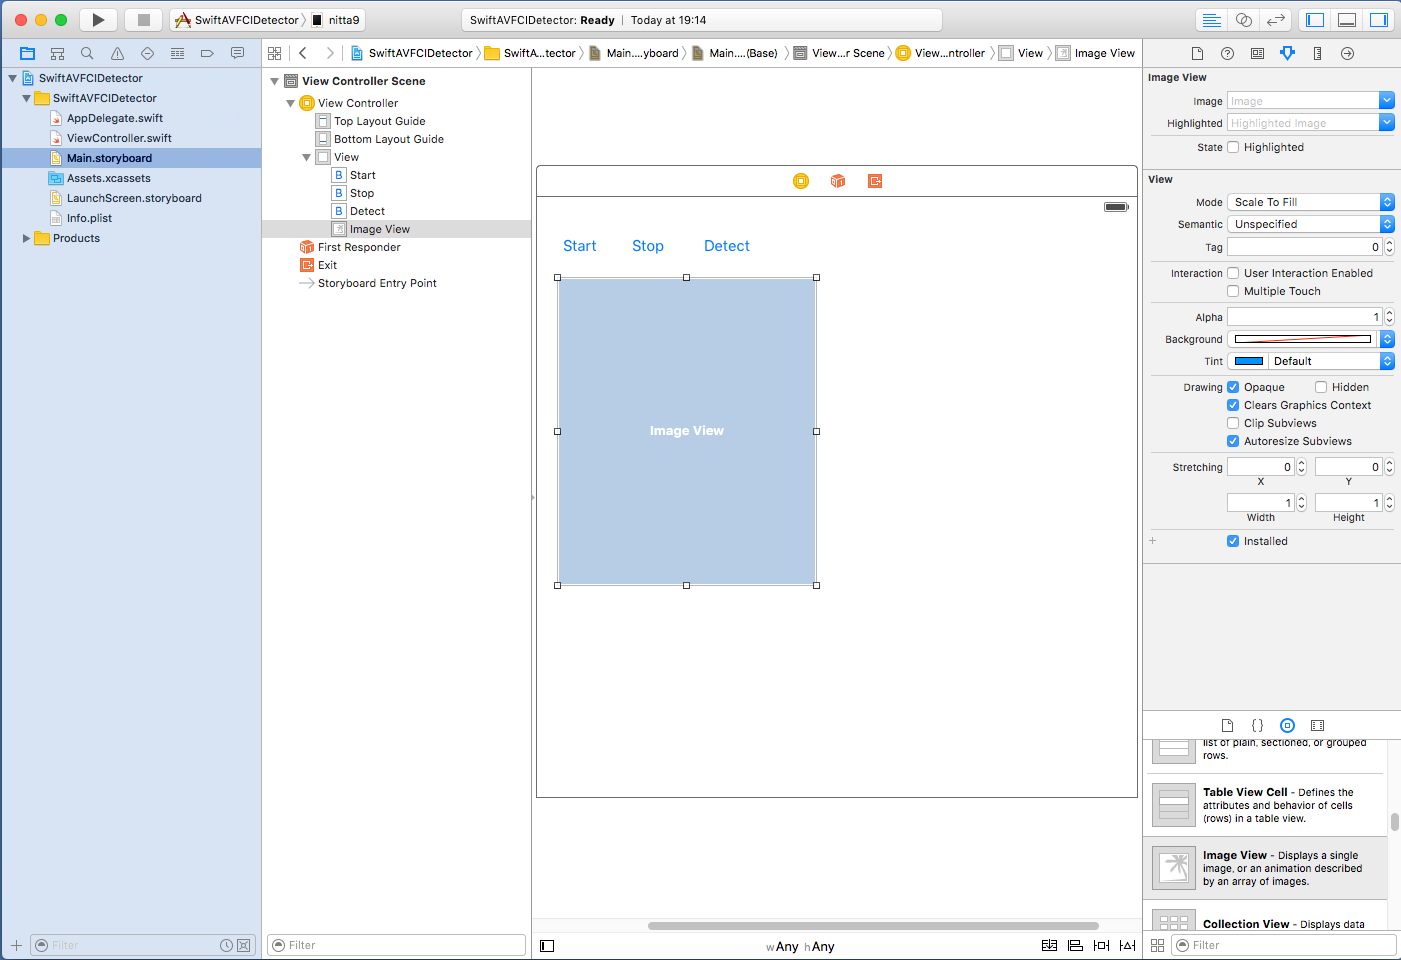
- "Start" Button --> tapStart 関数
- "Stop" Button --> tapStop 関数
- "Detect" Button --> tapDetect 関数
- Image View --> myImageView 変数

青字部分が Main.storyboard の操作で追加した IBOutlet 変数と IBAction 関数に関するコードで、 赤字部分が AVFoundation でビデオのフレームを取得しているコードで、 緑字部分が CIDetector で顔を認識しているコードです。
顔認識の部分では
        let ciImage:CIImage! = CIImage(image: image)
        let features = detector.featuresInImage(ciImage)
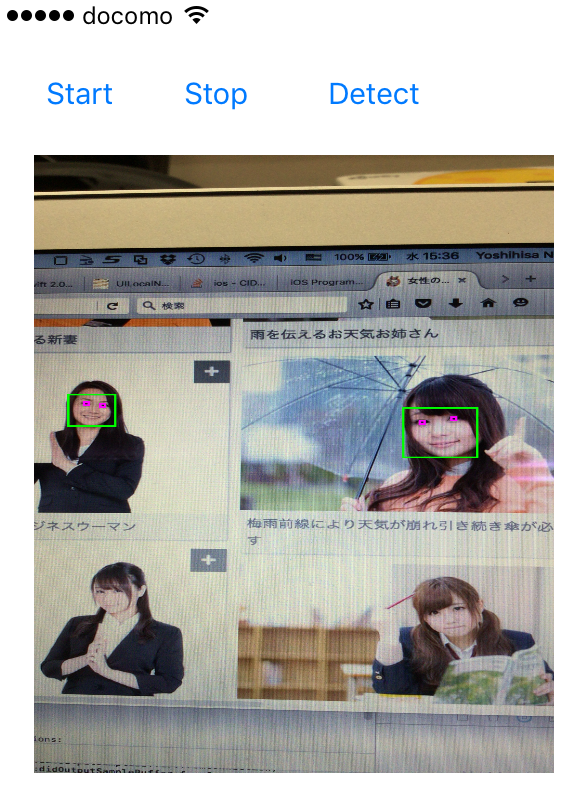
と記述すれば顔の矩形領域を認識するだけですが、この例では笑顔認識もさせるように
        let ciImage:CIImage! = CIImage(image: image)
        let options = [CIDetectorSmile:true]
        let features = detector.featuresInImage(ciImage, options:options)
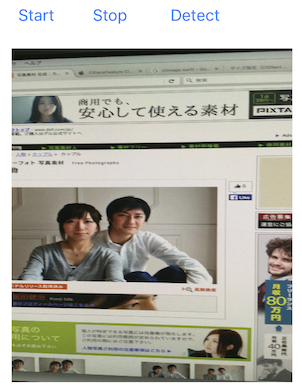
とオプションを記述しています。笑顔の場合は緑枠で、そうでない場合は赤枠で顔を表示します。
また、UIImgeでは左上が原点となりますが、顔認識で得られた領域を表す bounds 変数(CGRect)では左下が原点となっているようで、コード内でy軸方向の座標を変換しています。
            var rect:CGRect = feature.bounds;
            rect.origin.y = image.size.height - rect.origin.y - rect.height;
| ViewController.swiftに追加するコード(赤字と緑字部分) |
import UIKit
import AVFoundation

class ViewController: UIViewController, AVCaptureVideoDataOutputSampleBufferDelegate {

    var detector: CIDetector!

    var mySession: AVCaptureSession!
    var myCamera: AVCaptureDevice!
    var myVideoInput: AVCaptureDeviceInput!
    var myVideoOutput: AVCaptureVideoDataOutput!
    var detectFlag: Bool = false

    @IBOutlet weak var myImageView: UIImageView!
    @IBAction func tapStart(sender: AnyObject) {
        mySession.startRunning()
    }
    @IBAction func tapStop(sender: AnyObject) {
        mySession.stopRunning()
    }
    @IBAction func tapDetect(sender: AnyObject) {
        detectFlag = !detectFlag
    }

    func captureOutput(captureOutput: AVCaptureOutput!, didOutputSampleBuffer sampleBuffer: CMSampleBuffer!, fromConnection connection: AVCaptureConnection!) {
        print("captureOutput:didOutputSampleBuffer:fromConnection)")
        if connection.supportsVideoOrientation {
            connection.videoOrientation = AVCaptureVideoOrientation.Portrait
        }
        dispatch_async(dispatch_get_main_queue(), {
            let image = self.imageFromSampleBuffer(sampleBuffer)
            if self.detectFlag {
                self.myImageView.image = self.detectFace(image)
            } else {
                self.myImageView.image = image
            }
        })
    }

    func imageFromSampleBuffer(sampleBuffer: CMSampleBufferRef) -> UIImage {
        let imageBuffer: CVImageBufferRef = CMSampleBufferGetImageBuffer(sampleBuffer)!
        CVPixelBufferLockBaseAddress(imageBuffer, 0)   // Lock Base Address
        let baseAddress = CVPixelBufferGetBaseAddressOfPlane(imageBuffer, 0)  // Get Original Image Information
        let bytesPerRow = CVPixelBufferGetBytesPerRow(imageBuffer)
        let width = CVPixelBufferGetWidth(imageBuffer)
        let height = CVPixelBufferGetHeight(imageBuffer)

        let colorSpace = CGColorSpaceCreateDeviceRGB()  // RGB ColorSpace
        let bitmapInfo = (CGBitmapInfo.ByteOrder32Little.rawValue | CGImageAlphaInfo.PremultipliedFirst.rawValue)
        let context = CGBitmapContextCreate(baseAddress, width, height, 8, bytesPerRow, colorSpace, bitmapInfo)
        let imageRef = CGBitmapContextCreateImage(context) // Create Quarts image

        CVPixelBufferUnlockBaseAddress(imageBuffer, 0)    // Unlock Base Address

        let resultImage: UIImage = UIImage(CGImage: imageRef!)

        return resultImage
    }

    func prepareVideo() {
        mySession = AVCaptureSession()
        mySession.sessionPreset = AVCaptureSessionPresetHigh
        let devices = AVCaptureDevice.devices()
        for device in devices {
            if (device.position == AVCaptureDevicePosition.Back) {
                myCamera = device as! AVCaptureDevice
            }
        }
        do {
            myVideoInput = try AVCaptureDeviceInput(device: myCamera)
            if (mySession.canAddInput(myVideoInput)) {
                mySession.addInput(myVideoInput)
            } else {
                print("cannot add input to session")
            }

            myVideoOutput = AVCaptureVideoDataOutput()
            myVideoOutput.videoSettings = [kCVPixelBufferPixelFormatTypeKey : Int(kCVPixelFormatType_32BGRA)]
            myVideoOutput.setSampleBufferDelegate(self,queue:dispatch_get_main_queue())
            myVideoOutput.alwaysDiscardsLateVideoFrames = true
            if (mySession.canAddOutput(myVideoOutput)) {
                mySession.addOutput(myVideoOutput)
            } else {
                print("cannot add output to session")
            }

            /* // preview background
             let myVideoLayer = AVCaptureVideoPreviewLayer(session: mySession)
             myVideoLayer.frame = view.bounds
             myVideoLayer.videoGravity = AVLayerVideoGravityResizeAspectFill
             view.layer.insertSublayer(myVideoLayer,atIndex:0)
             */
        } catch let error as NSError {
            print("cannot use camera \(error)")
        }
    }

    func detectFace(image: UIImage) -> UIImage {
        let ciImage:CIImage! = CIImage(image: image)
        let options = [CIDetectorSmile:true]
        let features = detector.featuresInImage(ciImage, options:options)
        UIGraphicsBeginImageContext(image.size);
        image.drawInRect(CGRectMake(0,0,image.size.width,image.size.height))
        let context: CGContextRef = UIGraphicsGetCurrentContext()!
        CGContextSetLineWidth(context, 5.0);
        for feature in features as! [CIFaceFeature] {
            if feature.hasSmile {
                CGContextSetRGBStrokeColor(context, 0.0, 1.0, 0.0, 1.0)
            } else {
                CGContextSetRGBStrokeColor(context, 1.0, 0.0, 0.0, 1.0)
            }
            var rect:CGRect = feature.bounds;
            rect.origin.y = image.size.height - rect.origin.y - rect.height;
            CGContextAddRect(context, rect);
        }
        CGContextStrokePath(context)
        let img = UIGraphicsGetImageFromCurrentImageContext()
        UIGraphicsEndImageContext()

        return img;
    }

    override func viewDidLoad() {
        super.viewDidLoad()
        detector = CIDetector(ofType: CIDetectorTypeFace, context: nil, options: [CIDetectorAccuracy:CIDetectorAccuracyHigh])
        prepareVideo()
    }

    override func didReceiveMemoryWarning() {
        super.didReceiveMemoryWarning()
    }

}
|
| --> |

|
上記の例で認識する画像は http://www.ashinari.com/2012/03/04-358659.php?category=48 を利用しました。
iOSでは、処理をキューに登録することでマルチスレッド動作をプログラミングできるようにしています (GCD, Grand Central Dispatch)。 dispatch_sync や dispatch_async を用いると実行すべき処理をクロージャで記述できるので、マルチスレッド動作の プログラムがとても記述しやすくなっています。
上記の例では、「ビデオをフレーム毎に処理をするスレッドを登録するキュー」も、 「画像をUIImageに変換してOpenCVの顔認識処理を行うスレッドを登録するキュー」も、 同じメイン・キュー dispatch_get_main_queue() を使っています。 GUIを操作するスレッドはメイン・キュー上で動作する必要があるので後者は仕方がないのですが、 「ビデオをフレーム毎に処理をするスレッド」は新たに作成した別のキューに登録するのが一般的のようです。 ただし、その場合は、「画像をUIImageに変換してOpenCVの顔認識処理を行うスレッド」の呼び出しを dispatch_async ではなくdispatch_sync で行わないと、 顔認識の重い処理が間に合わずどんどん溜っていくのでやたらと実行が遅くなってしまいます。
以上の点を考慮してViewController.swift を書き直すとすると、次のような変更になるでしょう。 私の環境では変更前でも十分に実用的な速度で動作しているので、前者を採用しています。 が、どちらがよいかは各自で試してみて下さい。
| ViewController.swiftの変更点 (diff -c の出力) |
*** ViewController.swift.org	2016-06-21 21:19:38.000000000 +0900
--- ViewController.swift	2016-06-21 21:19:57.000000000 +0900
***************
*** 34,40 ****
          if connection.supportsVideoOrientation {
              connection.videoOrientation = AVCaptureVideoOrientation.Portrait
          }
!         dispatch_async(dispatch_get_main_queue(), {
              let image = self.imageFromSampleBuffer(sampleBuffer)
              if self.detectFlag {
                  self.myImageView.image = self.detectFace(image)
--- 34,40 ----
          if connection.supportsVideoOrientation {
              connection.videoOrientation = AVCaptureVideoOrientation.Portrait
          }
!         dispatch_sync(dispatch_get_main_queue(), {
              let image = self.imageFromSampleBuffer(sampleBuffer)
              if self.detectFlag {
                  self.myImageView.image = self.detectFace(image)
***************
*** 83,89 ****

              myVideoOutput = AVCaptureVideoDataOutput()
              myVideoOutput.videoSettings = [kCVPixelBufferPixelFormatTypeKey : Int(kCVPixelFormatType_32BGRA)]
!             myVideoOutput.setSampleBufferDelegate(self,queue:dispatch_get_main_queue())
              myVideoOutput.alwaysDiscardsLateVideoFrames = true
              if (mySession.canAddOutput(myVideoOutput)) {
                  mySession.addOutput(myVideoOutput)
--- 83,89 ----

              myVideoOutput = AVCaptureVideoDataOutput()
              myVideoOutput.videoSettings = [kCVPixelBufferPixelFormatTypeKey : Int(kCVPixelFormatType_32BGRA)]
!             myVideoOutput.setSampleBufferDelegate(self,queue:dispatch_queue_create("myqueue",nil))
              myVideoOutput.alwaysDiscardsLateVideoFrames = true
              if (mySession.canAddOutput(myVideoOutput)) {
                  mySession.addOutput(myVideoOutput)
|