実行時の動画 Humanoid2.mp4
以下の説明では、Humanoid.zip を展開してフォルダ名を Humanoid2 に変更し、Unity で Open して操作したものです。
列挙型 enum Bone を定義し、この Bone 型の変数 "bone" を public で宣言します。 こう記述することで Unity Editor の Inspector ウィンドウに表示される "Rig Control 3 (Script)" コンポーネントに "Bone" という項目ができ、 Unity Editor のプログラム実行中に操作対象のボーンを ポップアップメニューで変更できるようになります。
Unity では HumanBodyBones.(Boneの名前) でBone を指定します。 したがって、このプログラムで勝手に定義した列挙型 Bone から、 HumanBodyBones への変換を定義する必要があります。 enum Bone型からUnityの HumanBodyBones 型へのマッピングを定義している のが変数 bodyBones です。
列挙型の全ての要素について操作するために Enum.GetValues() 関数を使っていますが、 Enum を使うにはプログラムの冒頭で "import System;" を宣言しておく必要があることに注意しましょう。
このプログラムでは、 各Boneの初期値に対して回転を加えるために RigBone クラスの offset(float,float,float,float) メソッドを使っています。 RigBone クラスはこのプロジェクトの Assets/Scripts/RigBone.cs で定義しています。
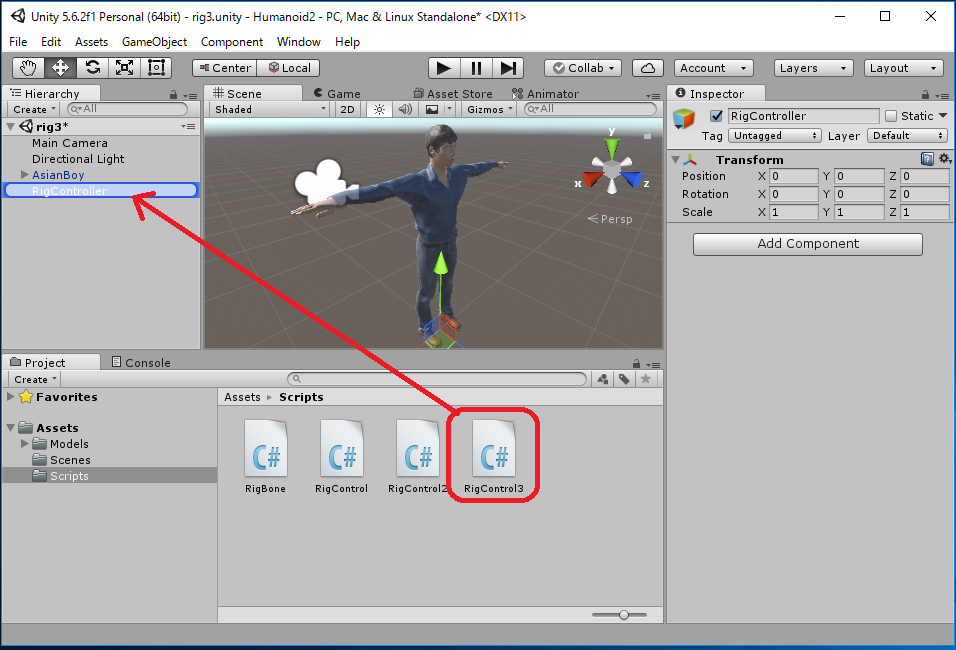
| RigControl3.cs |
using System.Collections;
using System.Collections.Generic;
using UnityEngine;
using System;
public class RigControl3 : MonoBehaviour {
public enum Bone {
Hips,
Spine,
Chest, // optional
UpperChest, // optional
Neck, // optional
Head,
LeftShoulder, // optional
LeftUpperArm,
LeftLowerArm,
LeftHand,
LeftUpperLeg,
LeftLowerLeg,
LeftFoot,
RightShoulder, // optional
RightUpperArm,
RightLowerArm,
RightHand,
RightUpperLeg,
RightLowerLeg,
RightFoot
}
private Dictionary<Bone,HumanBodyBones> bodyBones = new Dictionary<Bone,HumanBodyBones>() {
{ Bone.Hips, HumanBodyBones.Hips },
{ Bone.Spine, HumanBodyBones.Spine },
{ Bone.Chest, HumanBodyBones.Chest },
{ Bone.UpperChest, HumanBodyBones.UpperChest },
{ Bone.Neck, HumanBodyBones.Neck },
{ Bone.Head, HumanBodyBones.Head },
{ Bone.LeftShoulder, HumanBodyBones.LeftShoulder },
{ Bone.LeftUpperArm, HumanBodyBones.LeftUpperArm },
{ Bone.LeftLowerArm, HumanBodyBones.LeftLowerArm },
{ Bone.LeftHand, HumanBodyBones.LeftHand },
{ Bone.LeftUpperLeg, HumanBodyBones.LeftUpperLeg },
{ Bone.LeftLowerLeg, HumanBodyBones.LeftLowerLeg },
{ Bone.LeftFoot, HumanBodyBones.LeftFoot },
{ Bone.RightShoulder, HumanBodyBones.RightShoulder },
{ Bone.RightUpperArm, HumanBodyBones.RightUpperArm },
{ Bone.RightLowerArm, HumanBodyBones.RightLowerArm },
{ Bone.RightHand, HumanBodyBones.RightHand },
{ Bone.RightUpperLeg, HumanBodyBones.RightUpperLeg },
{ Bone.RightLowerLeg, HumanBodyBones.RightLowerLeg },
{ Bone.RightFoot, HumanBodyBones.RightFoot }
};
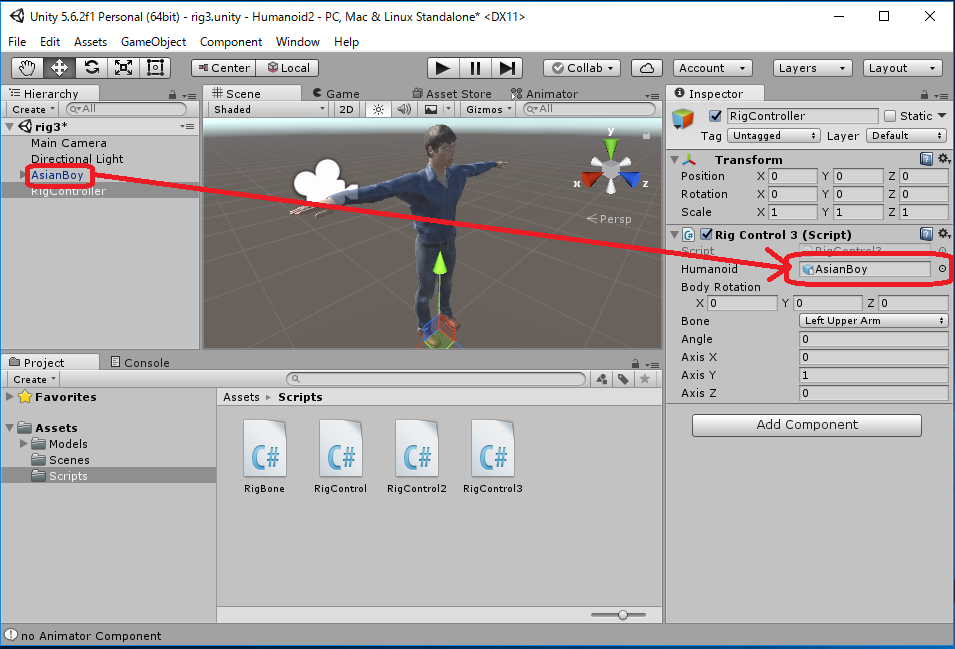
public GameObject humanoid;
public Vector3 bodyRotation = new Vector3(0,0,0);
public Bone bone = Bone.LeftUpperArm;
public float angle = 0;
public float axisX = 0.0f;
public float axisY = 1.0f;
public float axisZ = 0.0f;
Dictionary <Bone,RigBone> rigBones;
void Start () {
rigBones = new Dictionary <Bone,RigBone>();
foreach (Bone b in Enum.GetValues(typeof(Bone))) {
rigBones.Add(b, new RigBone(humanoid, bodyBones[b] ));
}
}
void Update () {
if (rigBones[bone].isValid == false) return;
rigBones[bone].offset(angle,axisX,axisY,axisZ);
humanoid.transform.rotation
= Quaternion.AngleAxis(bodyRotation.z,new Vector3(0,0,1))
* Quaternion.AngleAxis(bodyRotation.x,new Vector3(1,0,0))
* Quaternion.AngleAxis(bodyRotation.y,new Vector3(0,1,0));
}
}
|
Rig Control (Script) の-> Remove Component
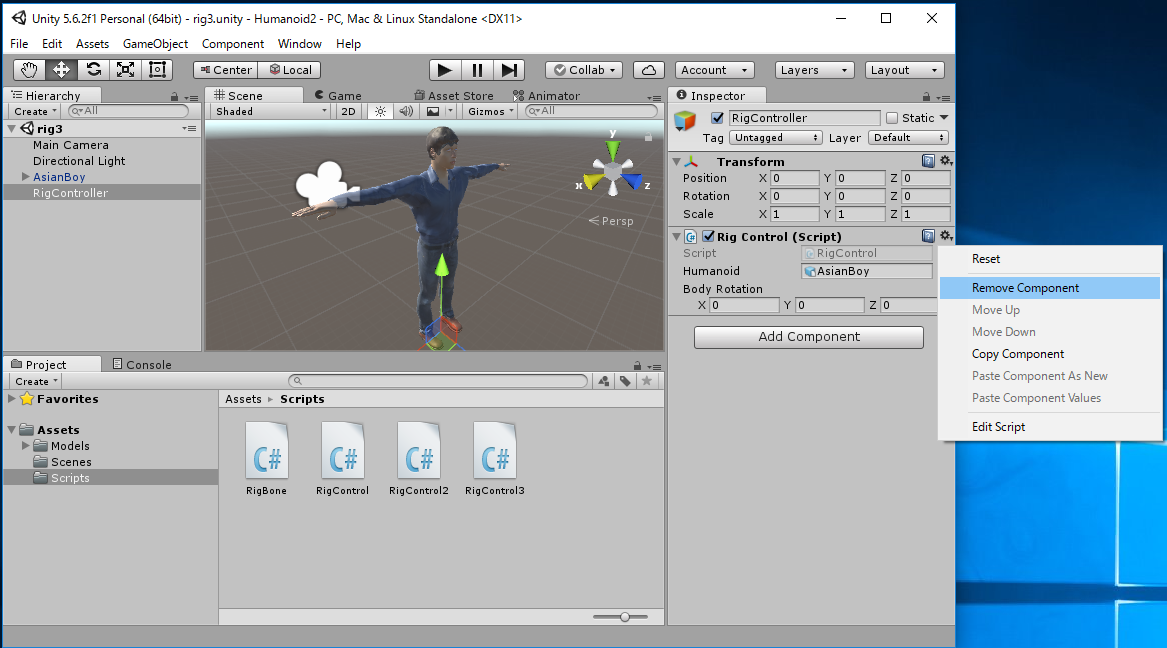
 をクリックして実行してみます。
この状態で Bone を選択します。 「Boneを選択してから、一旦 Angle を0 としてから、 回転軸(Axis)のX, Y, Zを変更して、それからAngleの値を設定する」のがうまく 値を設定するコツです。 これでそのBoneの固有の座標系において回転軸の回りにAngle角度回転します。

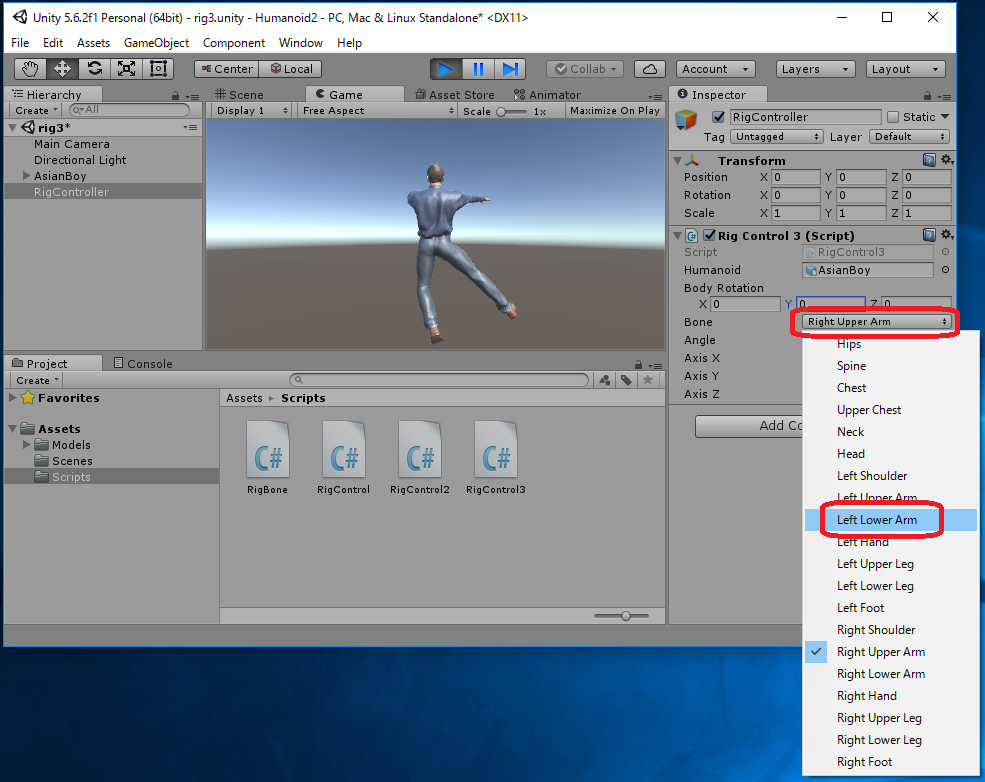
BodyRotation を (X,Y,Z)=(0,180,0)にすると、Humanoidがカメラ方向を向きます。 この状態で操作した方がイメージをつかみやすいかもしれません。

[注意] RigControl3.cs で 定義している Bone 列挙型には、 Unity の Animator において「必須ではない(= optional な) Bone」も含まれています。 そのため利用した Humanoid のデータによっては 「割り当てが存在しないoptional なBone の Transform を取得」しようとして 実行時にエラーが出てしまうかもしれません。 そのような場合は、列挙型 Bone の定義から optional なBone (プログラム中で // optional と書かれています)をコメントアウトして下さい。
既に rig3.unity シーンを作成していましたので、上書きします。
File -> Save Scenes
Unity's coordinate system is left-handed. In the left-handed coordinate system, the positive rotate direction about each axis is "clockwise when looking at the origin from infinity of its axis".
 |
| Positive Rotate Direction Around Each Axis |
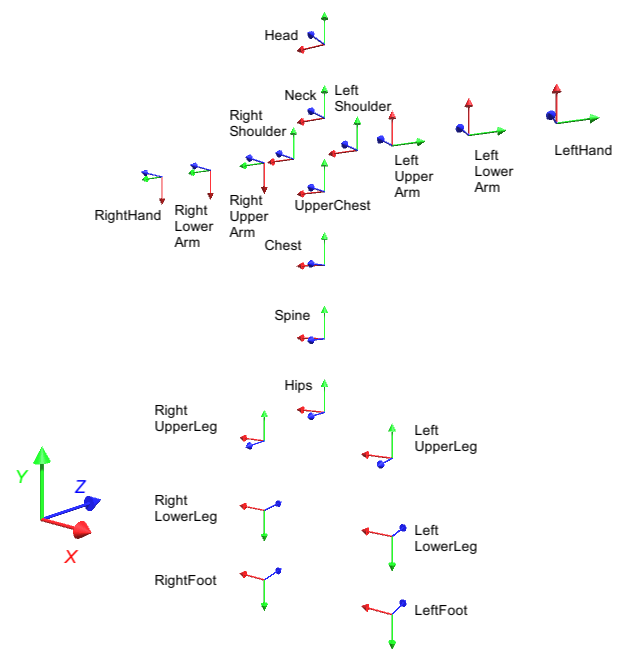
各Boneにおいて (Axis X, Axis Y, Axis Z) = (1, 0, 0) の状態で Angle の値を増やしていくと、Boneが回転する方向によって そのBone の局所座標系 (すなわち Transform) のX軸の向きがわかります。 同様に、(Axis X, Axis Y, Axis Z) = (0, 1, 0) の状態ではY軸の向きが、 (Axis X, Axis Y, Axis Z) = (0, 0, 1) の状態ではZ軸の向きがわかります。 この手順を繰り返して、各 Bone の回転軸について調べた結果を次の図に示します。