How to create and use a DLL is explained at the Microsoft official pages.
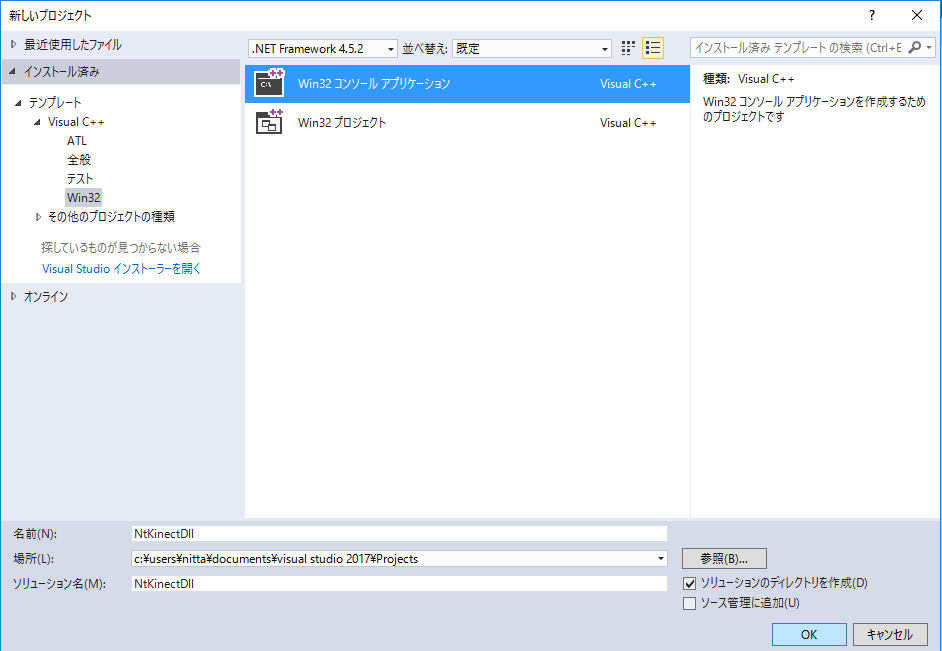
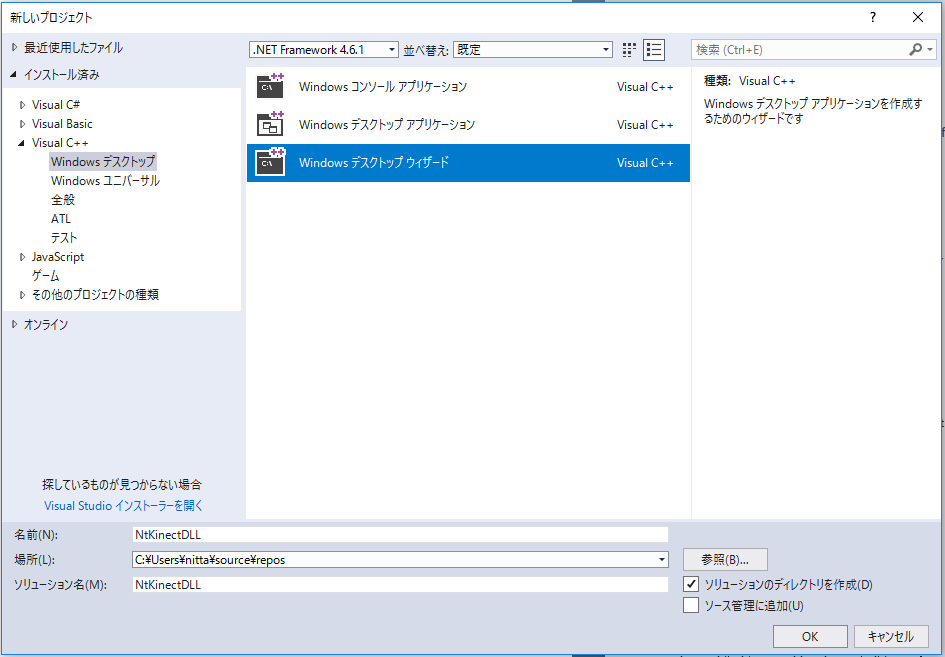
Let's create a DLL file using OpenCV and Kinect V2 via NtKinect. Visual Studio Proefssional 2017 provides a project template to create Dlls in C++.
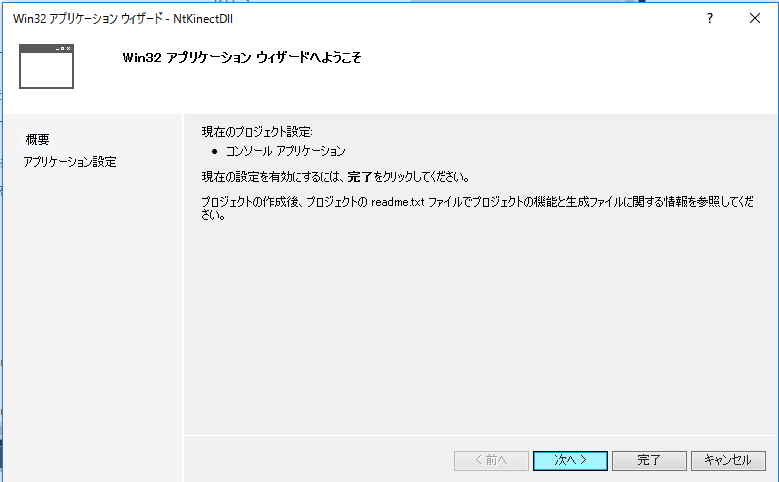
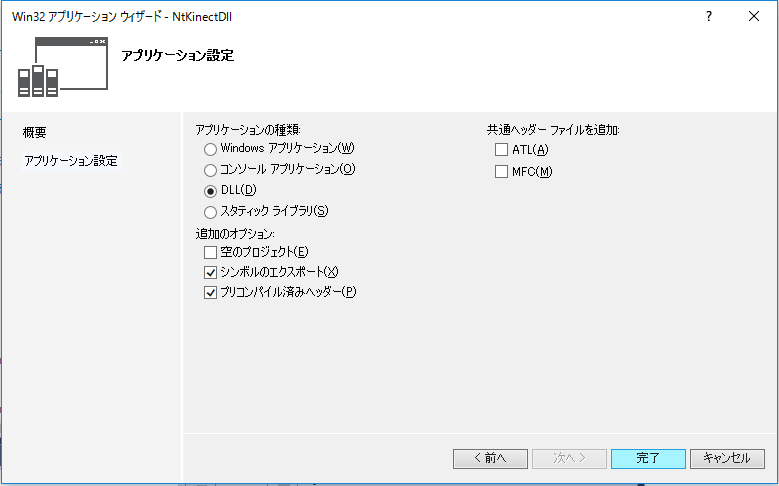
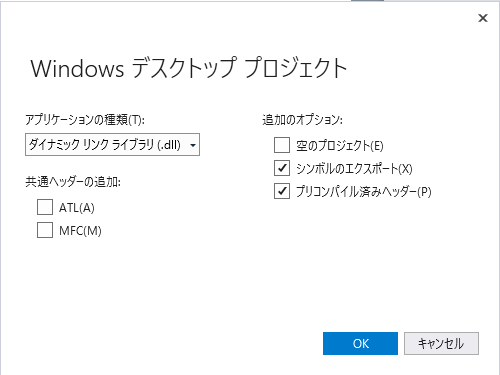
Input Name -> "OK" -> Select "Next" and go to "Application settings"
Type the project name and click "OK" button.
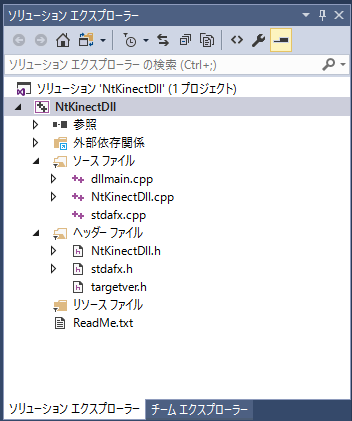
Examples of the declaration of variables, functions, and classes has already been inserted in the header file. Write your own declaration referring those examples. The predecessor of the function declaration "PROJECT_NAME_API" is also defined here. In this case, the predecessor is "NTKINECTDLL_API".
Examples of the definition of variables, functions, and classes has already been inserted in the c++ file. Write you own definition referring those examples. As seen in examples, you must write "PROJECT_NAME_API" ("NTKINECTDLL_API" in this case) before your function definition. This predecessor is for the export/import switching.
Let's actually create a DLL library that use Kinect V2 and use it in Unity.
I will explain by an example of recognizing the state of right palm (Open, Closed, Lasso), because I think is an easiest example to understand.
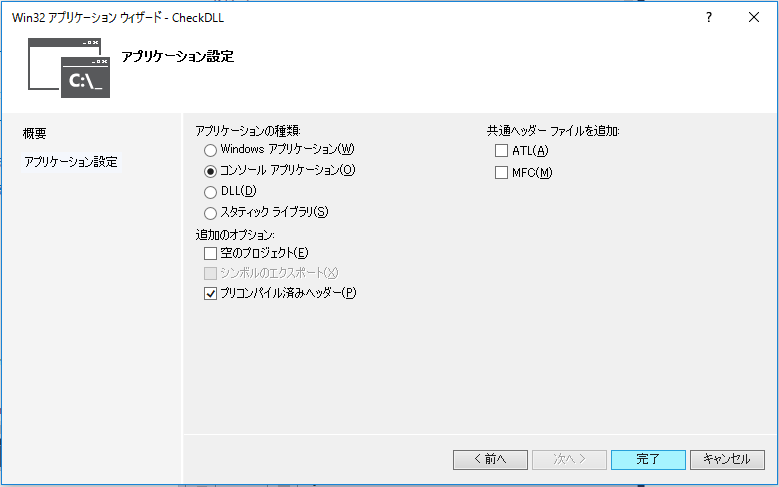
The name here is "NtKinectDll". The solution name will automatically be "NtKinectDll". OK -> Select "Next" and go to "Setting up the application"
The name here is "NtKinectDll". The solution name will automatically be "NtKinectDLL". Click OK button.

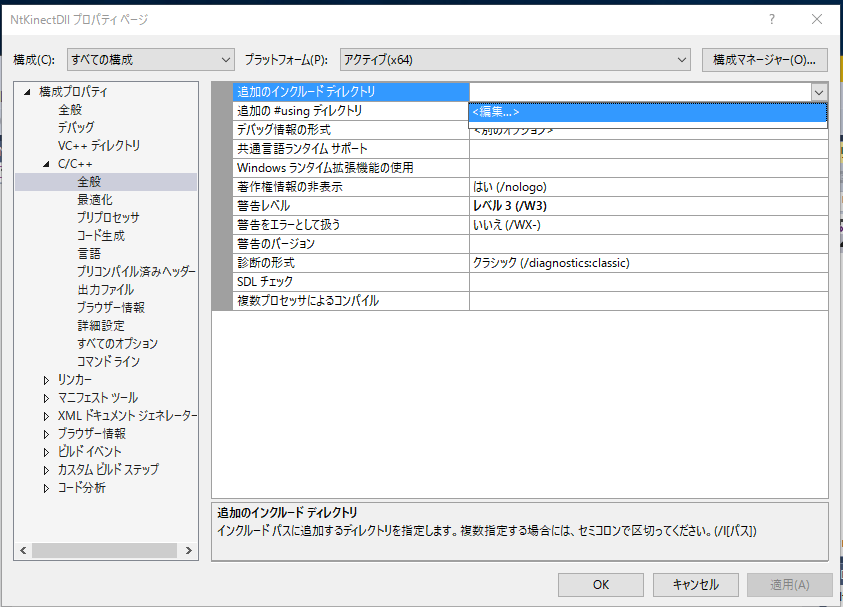
"Configuration Properties" -> "C/C++" -> "General" -> "Additional include directory"
  $(KINECTSDK20_DIR)inc
  C:\opencv\include


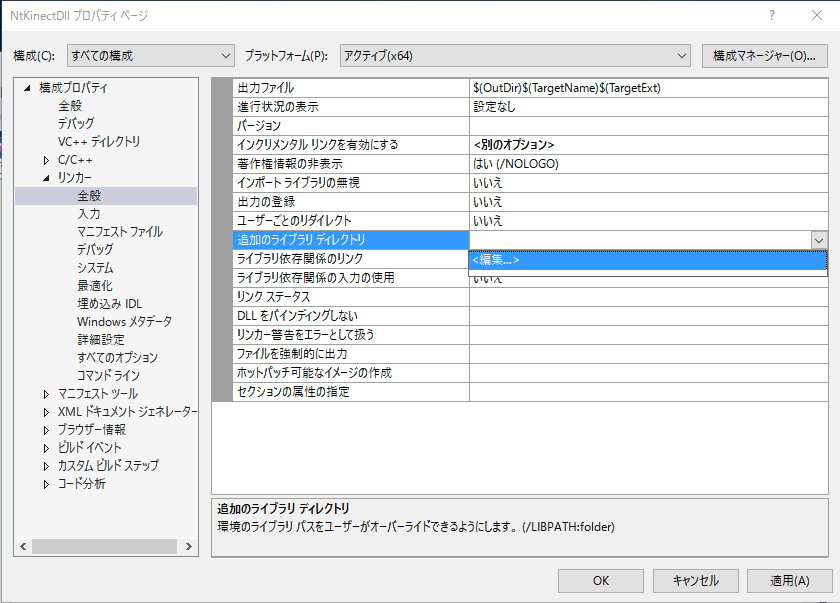
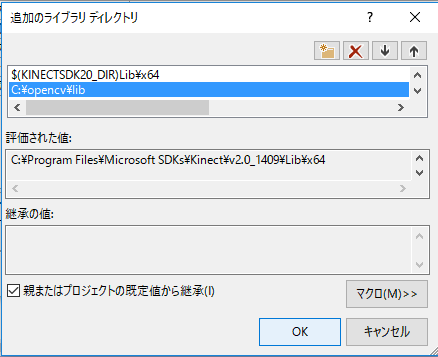
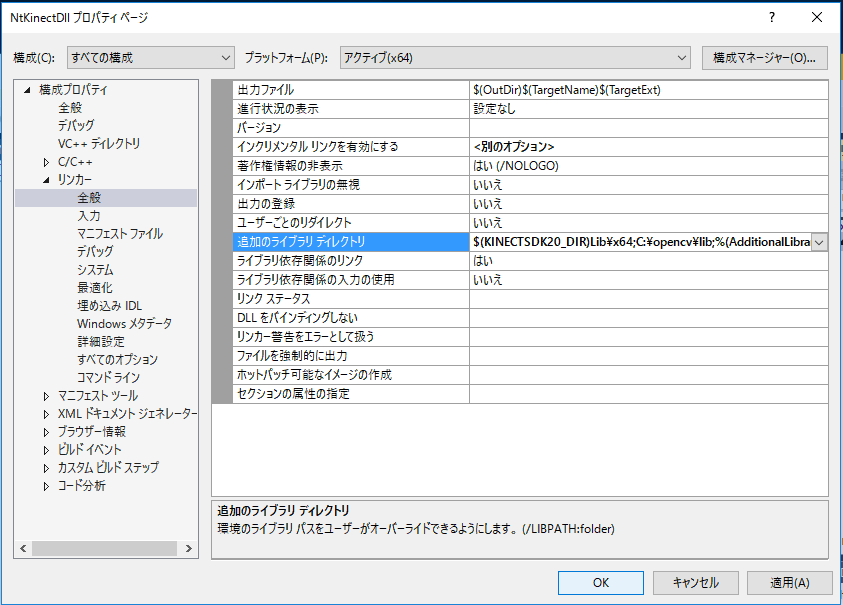
"Configuration Properties" -> "Linker" -> "General" -> "Additional library directory"
  $(KINECTSDK20_DIR)Lib\x64
  C:\opencv\lib
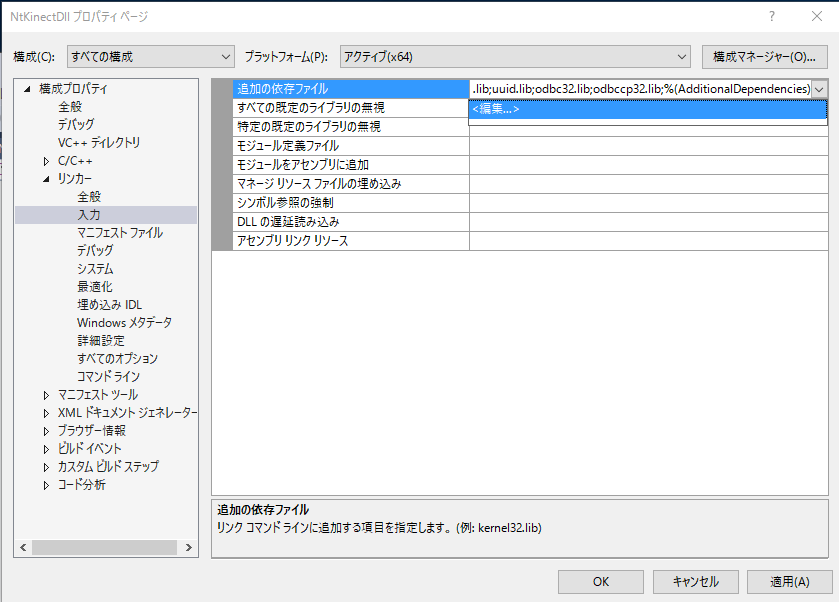
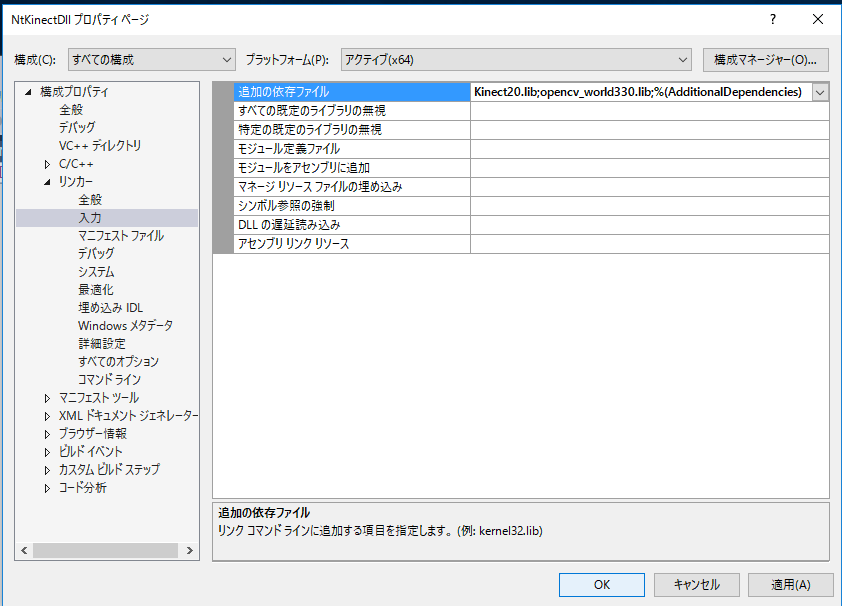
"Configuration Properties" -> "Linker" -> "General" -> "Input"
  Kinect20.lib
  opencv_world330.lib

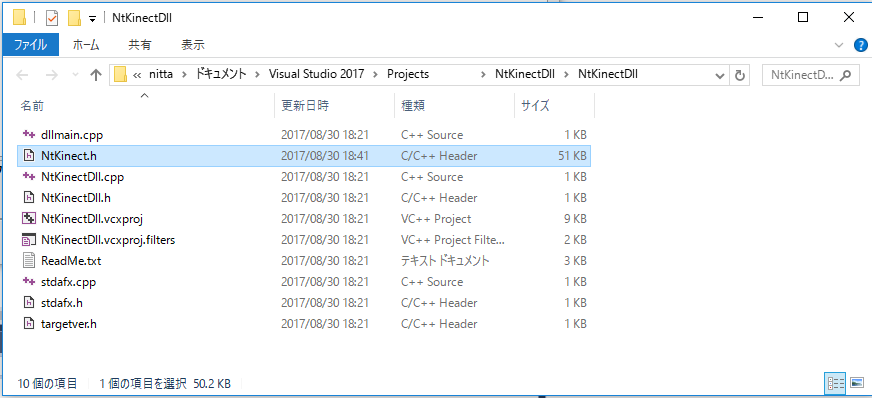
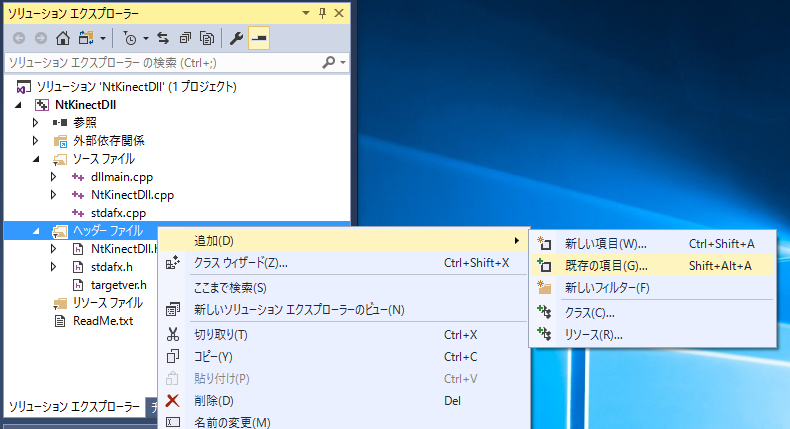
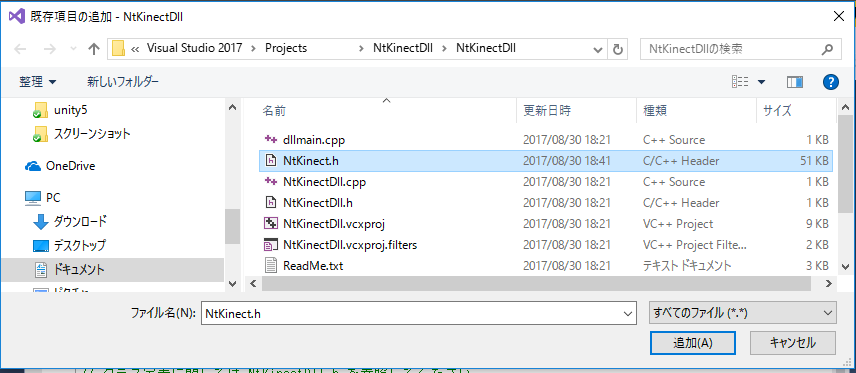
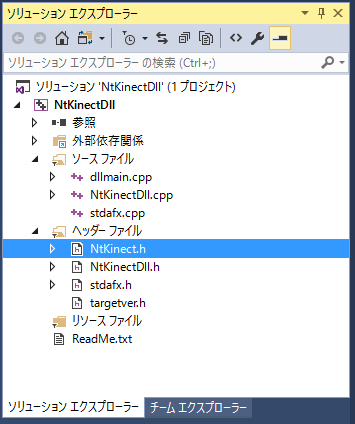
Please download NtKinet.h from the above link. Place NtKinect.h in the folder where the project's source files such as dllmain.cpp are located (NtKinectDll/NtKinectDll/ in this example). Right-click on "header file" of "Solution Explorer" and select "Add" -> "Select Existing Files" -> NtKinect.h.
The part of green letter is the part related to import/export of the DLL defined since the project was created. NtKinectDll.h is a declaration for export in this project, and it becomes a declaration for import in other projects.
The part of blue letter is the part about the functions we defined ourselves. To avoid mangling function names in C++, we declare function prototypes in extern "C" {}. This makes it possible to use this DLL in other languages. The word Mangling means that the function name is changed by the C++ compiler to a name including return value and arguments type.
| NtKinectDll.h |
#ifdef NTKINECTDLL_EXPORTS
#define NTKINECTDLL_API __declspec(dllexport)
#else
#define NTKINECTDLL_API __declspec(dllimport)
#endif

extern "C" {
  NTKINECTDLL_API void* getKinect(void);
  NTKINECTDLL_API int rightHandState(void* kinect);
}
|
Please note that "NTKINECTDLL_API" must be written at the beginning of function definition.
In the DLL, the object must be allocated in the heap memory. For this reason, the void* getKinect() function instantiate a new NtKinect object on heap, and returns its pointer casting to (void *).
When executing a function of the DLL, the pointer to the NtKinect Object is given as an argument of type (void *). We cast it to a pointer of (NtKinect *) type and use NtKinect's function via it. For example, access to a member variable "rgbImage" is described as (*kinect).rgbImage. In the rightHandState(void *) function, the image acquired by the RGB camera is first reduced to 1/16, the joint is drawn in red on it, and the image is displayed by cv::imshow(). In order to correctly display the contents of the OpenCV window, it is necessary to call cv::waitKey(1); After that, the program return the state of someone's right palm state. The meaning of the value is defined in Kinect.h as follows.
enum _HandState {
    HandState_Unknown= 0,
    HandState_NotTracked= 1,
    HandState_Open= 2,
    HandState_Closed= 3,
    HandState_Lasso= 4
};
| NtKinectDll.cpp |
#include "stdafx.h" #include "NtKinectDll.h" #include "NtKinect.h" using namespace std; NTKINECTDLL_API void* getKinect(void) { NtKinect* kinect = new NtKinect; return static_cast<void*>(kinect); } NTKINECTDLL_API int rightHandState(void* ptr) { NtKinect *kinect = static_cast<NtKinect*>(ptr); (*kinect).setRGB(); (*kinect).setSkeleton(); int scale = 4; cv::Mat img((*kinect).rgbImage); cv::resize(img,img,cv::Size(img.cols/scale,img.rows/scale),0,0); for (auto person: (*kinect).skeleton) { for (auto joint: person) { if (joint.TrackingState == TrackingState_NotTracked) continue; ColorSpacePoint cp; (*kinect).coordinateMapper->MapCameraPointToColorSpace(joint.Position,&cp); cv::rectangle(img, cv::Rect((int)cp.X/scale-2, (int)cp.Y/scale-2,4,4), cv::Scalar(0,0,255),2); } } cv::imshow("rgb",img); cv::waitKey(1); for (int i=0; i<(*kinect).skeleton.size(); i++) { Joint right = (*kinect).skeleton[i][JointType_HandRight]; if (right.TrackingState == TrackingState_NotTracked) continue; auto state = (*kinect).handState(i,false); if (state.first == HandState_Open || state.first == HandState_Closed || state.first == HandState_Lasso ) { return state.first; } } return HandState_Unknown; } |
[Caution] Do just "Compile", "Build", or "Rebuild". Do not "Run" or "Debug" here. Since we have not write the program body, an meaningless error will occur if you try to "Run" or "Debug".
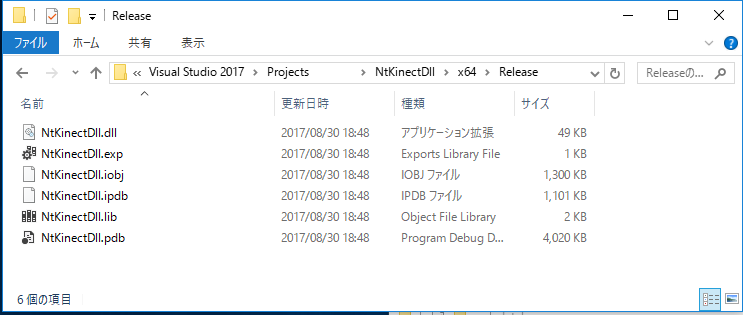
[Caution2] ".dll" and ".lib" files are generated in the "x64/Release/" folder immediately under the project, that is, "(ProjectName)/x64/Release". Do not search wrong folders like "(ProjectName)/NtKinectDll/x64/Release".
[Caution3](Oct/07/2017 added)
If you encounter "dllimport ..." error when building with Visual Studio 2017 Update 2
(version 15.3.5),
please
refer to here
and deal with it
to define
NTKINECTDLL_EXPORTS
in NtKinectDll.cpp.
(Nov/03/2017 added) This bug is fixed in Visual Studio 2017 version 15.4 released Oct/11/2017.
Since the above zip file may not include the latest "NtKinect.h", Download the latest version from here and replace old one with it.
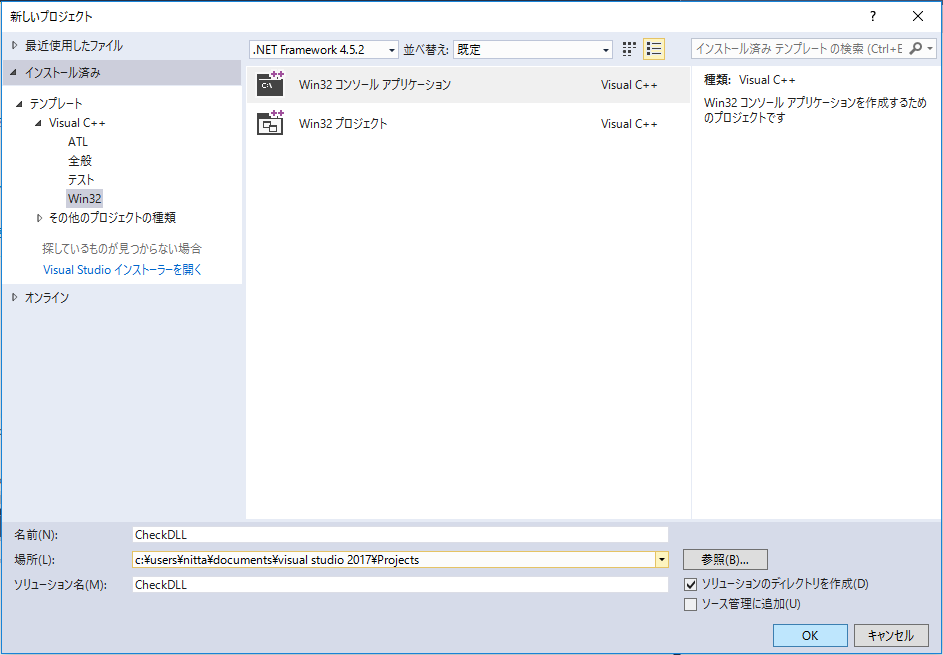
Let's create a simple project to confirm that the generated DLL file works properly.
Input the name as "CheckDLL", select "OK" -> "Next" and goto "Application settings".

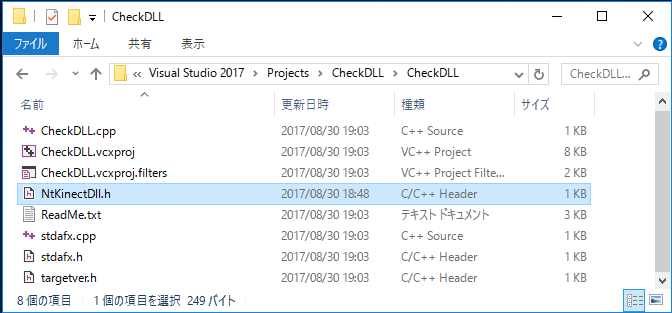
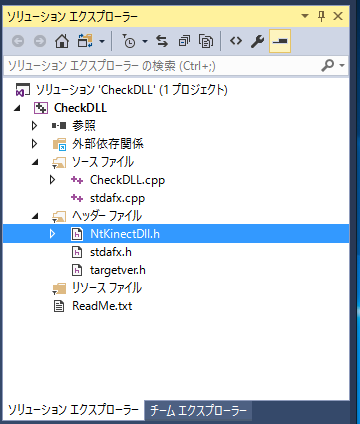
Copy NtKinectDll.h to the folder where the project source files (stdafx.cpp or CheckDll.cpp) are located. After that, right-click on "Header file" in "Solution Explorer" and select "Add" -> "Select existing file" -> NtKinectDll.h.
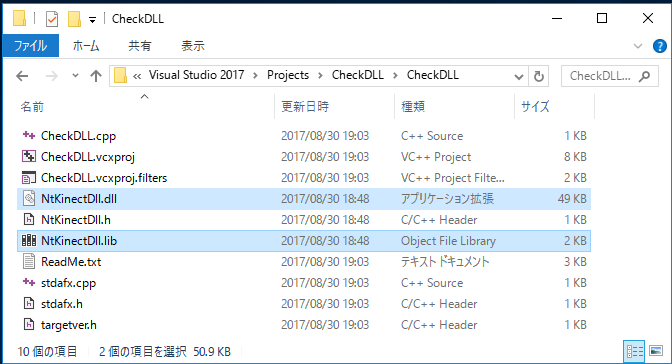
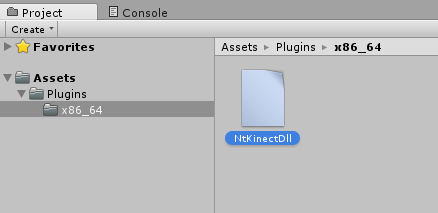
Copy NtKinectDll.dll and NtKinectDll.lib to the folder where the project source files (stdafx.cpp or CheckDll.cpp) are located.
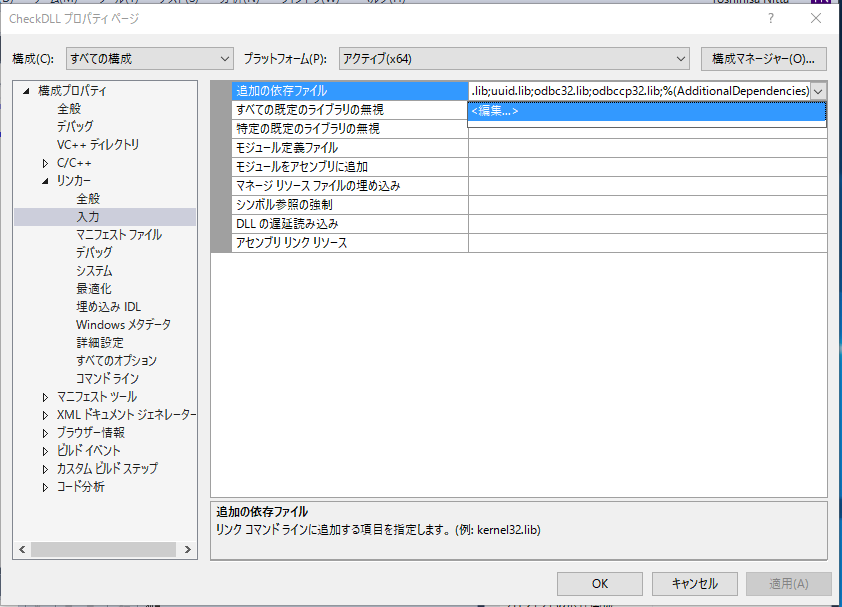
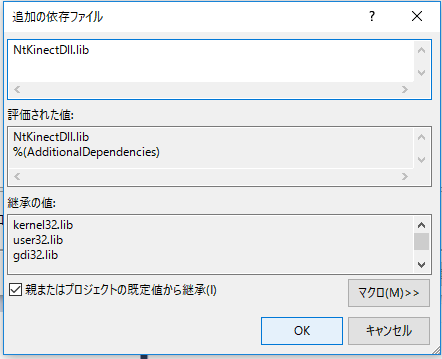
At the "Project's properties", "Linker" -> "Input" -> "Additional dependencies file" -> add NtKinectDll.lib.

| CheckDLL.cpp |
#include "stdafx.h"
#include <iostream>
#include <sstream>
#include "NtKinectDll.h"
using namespace std;
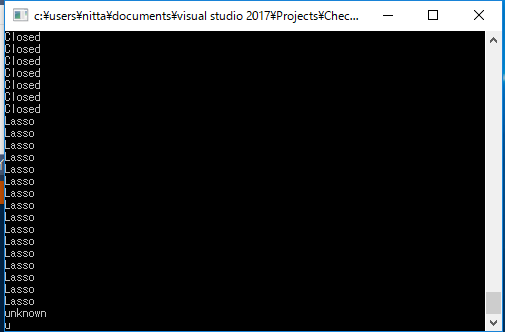
int main() {
void* kinect = getKinect();
while (1) {
int state = rightHandState(kinect);
switch (state) {
case 2: cout << "Open" << endl; break;
case 3: cout << "Closed" << endl; break;
case 4: cout << "Lasso" << endl; break;
default: cout << "unknown" << endl; break;
}
}
return 0;
}
|
Let's use NtKinectDll.dll in Unity.

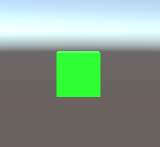
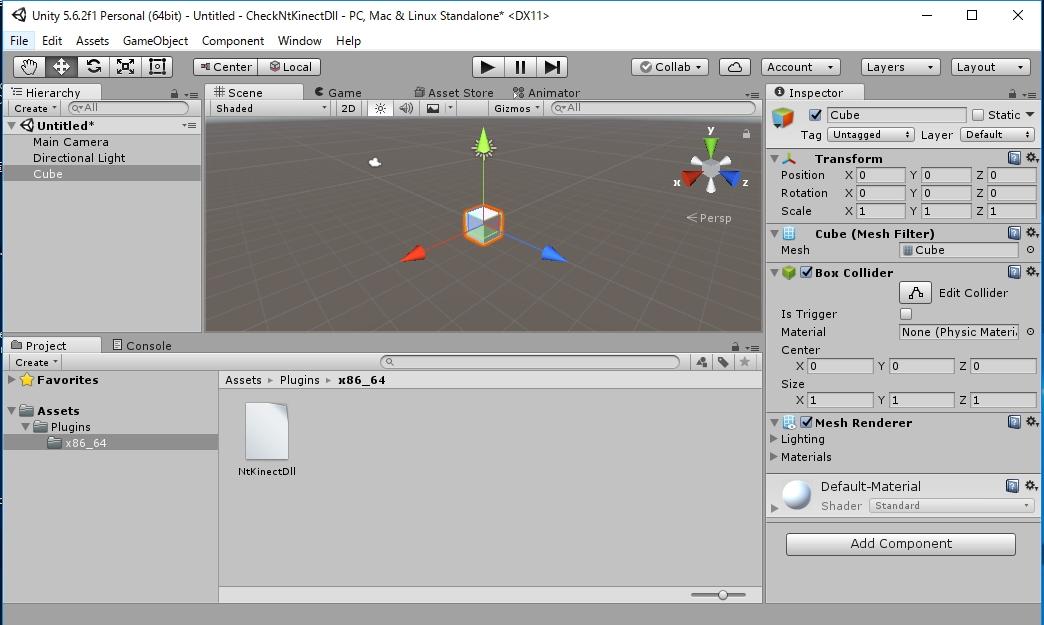
From the menu at the top, "Game Object"-> "3D Object" -> "Cube"
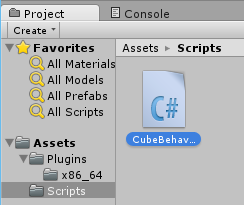
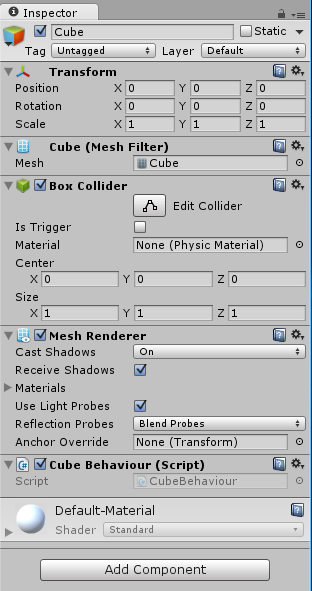
From the menu at the top, "Assets" -> "Create" -> "C# Script" -> Filename is CubeBehaviour
C++ pointers are treated as System.IntPtr in C#.
| CubeBehaviour.cs |
using UnityEngine;
using System.Collections;
using System.Runtime.InteropServices;

public class CubeBehaviour : MonoBehaviour {
    [DllImport ("NtKinectDll")] private static extern System.IntPtr getKinect();
    [DllImport ("NtKinectDll")] private static extern int rightHandState(System.IntPtr kinect);
    private System.IntPtr kinect;

    void Start () {
	kinect = getKinect();
    }

    void Update () {
	int state = rightHandState(kinect);
	if (state == 2) {
	    gameObject.GetComponent<Renderer>().material.color = new Color(1.0f, 0.0f, 0.0f, 1.0f);
	} else if (state == 3) {
	    gameObject.GetComponent<Renderer>().material.color = new Color(0.0f, 1.0f, 0.0f, 1.0f);
	} else if (state == 4) {
	    gameObject.GetComponent<Renderer>().material.color = new Color(0.0f, 0.0f, 1.0f, 1.0f);
	} else {
	    gameObject.GetComponent<Renderer>().material.color = new Color(1.0f, 1.0f, 1.0f, 1.0f);
	}
    }
}
|
[Notice] We generates an OpenCV window in DLL to display the skeleton recognition state. Note that when the OpenCV window is focused, that is, when the Unity game window is not focused, the screen of Unity will not change. Click on the top of Unity's window and make it focused, then try the program's behaviour.