NtKinectDLL and NtUnity: Tutorial:

Record Video with Kinect V2


2017.10.05: created by
Japanese English

This content corresponds to NtUnity.cs version 1.2 or later.

To Table of Contents

Prerequisite knowledge


Record Video with Kinect V2

  1. I will use the Unity project created in "Using NtKinectDLL in Unity (Fundamental Settings)". Download UnityDLL01.zip and expand it. Also change the name of the expanded folder to "UnityDLL07/".
  2. "NtKinectDLL.dll" and "NtUnity.cs" included int the Unity project file you downloaded may be outdated, so please downlaod and replace the latest version.
  3.     UnityDLL07/Assets/Plugins/x86_64/NtKinectDLL.dll
        UnityDLL07/Assets/Scripts/NtUnity.cs
    
  4. Create a new scene and save it under "Assets/Scenes/" as "Sample07.unity".
  5. File -> New Scene
    
    File -> Save Scene as ... -> Sample07.unity
    
  6. Create new C# script under "Assets/Scripts/" in the Project window.
  7. from above menu -> "Assets" -> "Create" -> "C# Script" -> Rename as "Sample07"

    Sample07.cs
    using System.Collections;
    using System.Collections.Generic;
    using UnityEngine;
    
    public class Sample07 : MonoBehaviour {
      NtUnity.Kinect nt;
      bool onSave;
      void Start () {
        nt = new NtUnity.Kinect();
        onSave = false;
      }
      void Update () {
        nt.setRGB();
        nt.setSkeleton();
        nt.setFace();
        nt.imshowBlack();
        if (Input.GetMouseButtonDown(0)) {
          if (onSave) {
    	nt.closeVideo();
    	onSave = false;
          } else {
    	nt.openVideo("myvideo.avi");
    	onSave = true;
          }
        }
        if (onSave) {
          nt.writeVideo();
        }
      }
      void OnApplicationQuit() {
        nt.stopKinect();
      }
    }
    
  8. Place an "Empty Object" in Hierarchy and change the name to "GameController".
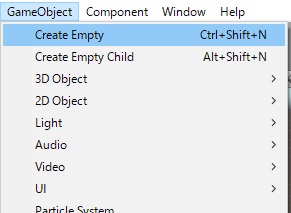
  9. above Menu -> GameObject -> Create Empty


  10. Add "Sample07.cs" as a Component of "GameController".


  11. When executed, the result of skeleton recognition and face recognition on the camera image is displayed in a separate window.
  12. Clicking the Unity "game screen" with the mouse left button starts the video recording of the camera image. Clicking it again saves the camera image up to that point and a file called "myvideo.avi" is created directly under the Unity project folder.
  13.   UnityDLL07/myvideo.avi
    
  14. The sample project of Unity is UnityDLL07.zip.


http://nw.tsuda.ac.jp/