

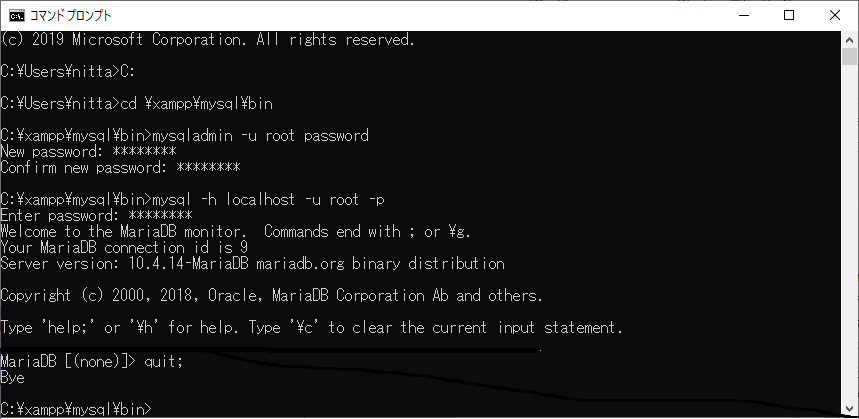
C:\xampp\mysql\bin\mysqladmin コマンドを使って、rootユーザにパスワードを設定する。
緑字の部分は自分の環境に合わせて変更すること。
| MySQLのrootユーザのパスワードを設定する |
C:\Users\nitta> C: |
C:\xampp\mysql\bin\mysql コマドを使って、MySQLサーバにrootユーザとしてアクセスしてみる。
| MySQLサーバにrootユーザとしてアクセスする |
C:\xampp\mysql\bin> mysql -h localhost -u root -p |
| C:\xampp\phpMyAdmin\config.inc.phpの変更 |
*** config.inc_org.php Thu Oct 29 20:52:12 2020 --- config.inc.php Thu Oct 29 20:55:17 2020 *************** *** 18,24 **** /* Authentication type and info */ $cfg['Servers'][$i]['auth_type'] = 'config'; $cfg['Servers'][$i]['user'] = 'root'; ! $cfg['Servers'][$i]['password'] = ''; $cfg['Servers'][$i]['extension'] = 'mysqli'; $cfg['Servers'][$i]['AllowNoPassword'] = true; $cfg['Lang'] = ''; --- 18,24 ---- /* Authentication type and info */ $cfg['Servers'][$i]['auth_type'] = 'config'; $cfg['Servers'][$i]['user'] = 'root'; ! $cfg['Servers'][$i]['password'] = 'PasswordOfRoot'; ←自分で決めたパスワードを記述すること $cfg['Servers'][$i]['extension'] = 'mysqli'; $cfg['Servers'][$i]['AllowNoPassword'] = true; $cfg['Lang'] = ''; |

ファイル:
C:\xampp\apache\conf\extra\httpd-xampp.conf
変更箇所