ハイトフィールドは、「2次元の図の各ピクセル毎の明るさを3次元方向の 高さとして扱って立体図形をつくり出す」ためのものです。 日本語の文字オブジェクトを作ったり、 統計データや実験データを3次元のグラフにしたりする以外に、 山や山脈のような自然の地形を作成することに使うことができます。
「ピグメント(pigment)」とは「色を指定する」ための属性でした。 ピグメントには大きく分けて3種類あります。
「カラーマップ(color_map)」で利用できるパターンには次のものがあります。
| agate (めのう) | bozo (ボウゾウ) | bumps (凸凹) | crackle (細かいひび) |
| dents (くぼみ) | gradient (勾配) | granite (花崗岩) | leopard (豹柄) |
| mandel (マンデル) | marble (大理石) | onion (タマネギ) | quilted (キルト柄) |
| radial (放射状) | ripples (波紋) | spiral1 (螺旋1) | spiral2 (螺旋2) |
| spotted (スポット) | waves (波) | wood (木) | wrinkles (しわ) |
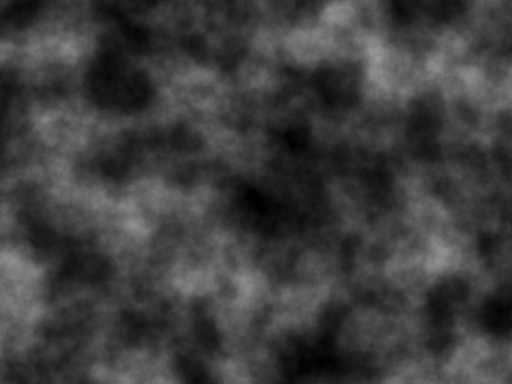
今回ハイトフィールドとして利用する、滑らかに濃淡が変化する2次元の図を POVRayで作成してみます。
ピクセル毎の明るさ(輝度, Brightness)がわかりやすいように、ここでは白黒(グレー)で表現しています。 RGBの場合は、次の式を使って輝度が計算されます。
輝度 = R * 0.30 + G * 0.59 + B * 0.11
| makeMap.pov |
#include "colors.inc"
#include "shapes.inc"
#include "textures.inc"

camera {
  location <0,50,0>
  look_at <0,0,0>
  angle 10
}

light_source { <0,100,0> color White }

object {
  Plane_XZ
  texture {
    pigment { wrinkles
              color_map {
                [0.1 color rgb <0, 0, 0> ]
                [0.4 color rgb <0.2, 0.2, 0.2> ]
                [0.6 color rgb <0.4, 0.4, 0.4> ]
                [0.9 color rgb <0.8, 0.8, 0.8> ]
                [1.0 color rgb <1.0, 1.0, 1.0> ]
              }
    }
  }
}
|
| 0.0〜0.1 | 黒 (0,0,0)で一定 |
|---|---|
| 0.1〜0.4 | 黒 (0,0,0)から暗い灰色(0.2,0.2,0.2)まで滑らかに変化 |
| 0.4〜0.6 | 暗い灰色(0.2,0.2,0.2)からやや暗い灰色(0.4,0.4,0.4)まで滑らかに変化 |
| 0.6〜0.9 | やや暗い灰色(0.4,0.4,0.4)からやや明るい灰色(0.8,0.8,0.8)まで滑らかに変化 |
| 0.9〜1.0 | やや明るい灰色(0.8,0.8,0.8)から白(1,1,1)まで滑らかに変化 |
color_mapを指定した他の例を示しておきます。
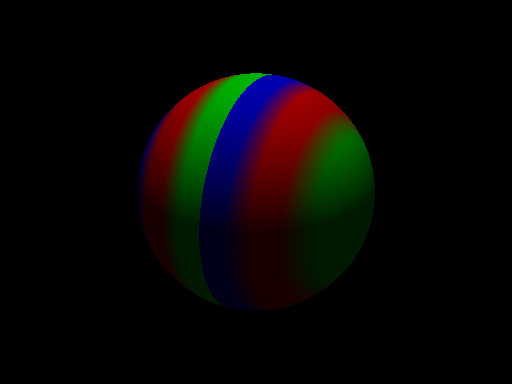
| colormapTest1.pov |
#include "colors.inc"
#include "shapes.inc"
#include "textures.inc"

camera {
  location <5,5,-10>
  look_at <0,0,0>
  angle 20
}

light_source { <0,10,0> color White }

object {
  Sphere
  texture {
    pigment { gradient x
              color_map {
                // [0.0 color rgb <0, 0, 1.0> ]
                [0.2 color rgb <0, 0, 1.0> ]
                [0.4 color rgb <1.0, 0.0, 0.0> ]
                [0.6 color rgb <1.0, 0.0, 0.0> ]
                [0.8 color rgb <0.0, 1.0, 0.0> ]
                // [1.0 color rgb <0.0, 1.0, 0.0> ]
              }
    }
  }
}
|
  $ bmp2png makeMap.bmp
  これで makeMap.png が作成される。
  $ mv makeMap.png mountain_map.png
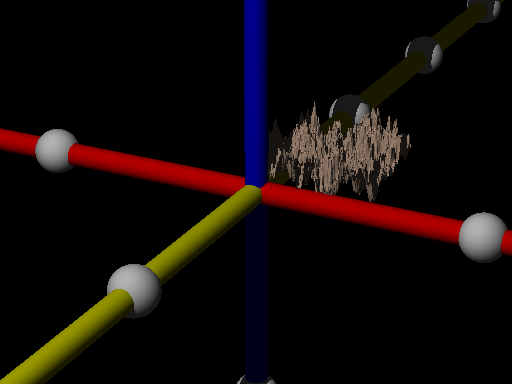
| mountain1.pov |
#include "colors.inc"
#include "shapes.inc"
#include "stones.inc"

#include "komuro.inc"

camera {
  location <5,5,-10>
  look_at <0,0,0>
  angle 20
}

light_source { <0,10,-10> color White }

object {
  height_field {
    png "mountain_map.png"
    smooth
  }
  texture {
    pigment { color LightWood }
  }
}

object { XYZaxis } |
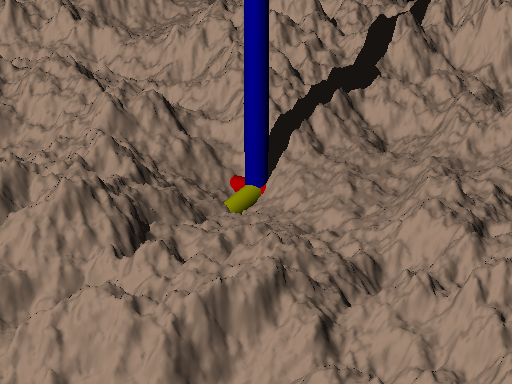
| mountain2.povへの変更 |
*** mountain1.pov	Wed Oct  7 09:21:30 2020
--- mountain2.pov	Wed Oct  7 09:21:30 2020
***************
*** 20,25 ****
--- 20,27 ----
    texture {
      pigment { color LightWood }
    }
+   translate <-0.5, 0, -0.5>
+   scale <10, 2, 10>
  }

  object { XYZaxis }
\ No newline at end of file
|
上記の colormapTest1.pov で作成した2次元の図をハイトフィールドとして使うと 次のようになります。
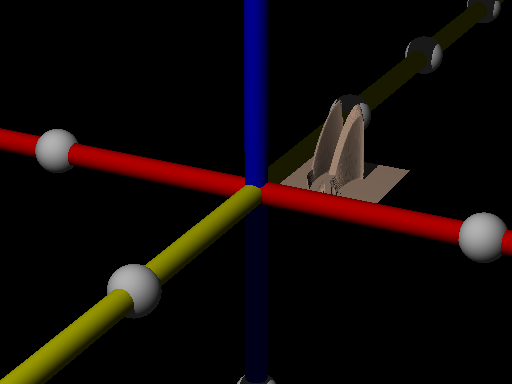
| mountain1.pov |
#include "colors.inc"
#include "shapes.inc"
#include "stones.inc"

#include "komuro.inc"

camera {
  location <5,5,-10>
  look_at <0,0,0>
  angle 20
}

light_source { <0,10,-10> color White }

object {
  height_field {
    png "mountain_map.png"
    smooth
  }
  texture {
    pigment { color LightWood }
  }
}

object { XYZaxis } |