How to make Kinect V2 face recognition as DLL and use it from Unity
2016.08.25: created by 
2017.10.07: revised by 


To Table of Contents
Prerequisite knowledge
Creating Dynamic Link Library using Face Recognition with Kinect V2
In the article "
NtKinect: How to make Kinect V2 program as DLL and use it from Unity
",
it is explained how to create a DLL file that uses the basic functions of OpenCV and Kinect V2 via NtKinect,
and use it from other programs and Unity.
Well, the programs that recognize face, speech and gesture with Kinect V2
require some additional DLL files corresponding to each function at execution time.
Here, I will explain
how to make your own NtKinect program as a DLL, when the program uses the Kinect V2 function
which needs some other DLLs and setting files,
and
How to use your NtKinect DLL from other languages/environments as C#/Unity, for example.
In this article, we will explain how to create a DLL file for face recognition.
How to write program
Let's craete a DLL library that perform face recognition
as an example of Kinect V2 functions that actually requieres other DLLs and additional files.
- Start using
the Visual Studio 2017's project
KinectV2_dll.zip
of
"How to make Kinect V2 program as DLL and use it from Unity" .
- Configure settings for include files and libraries from project's properties.
-
In the Solution Explorer, right-click over the project name and select "Properties" in the menu.
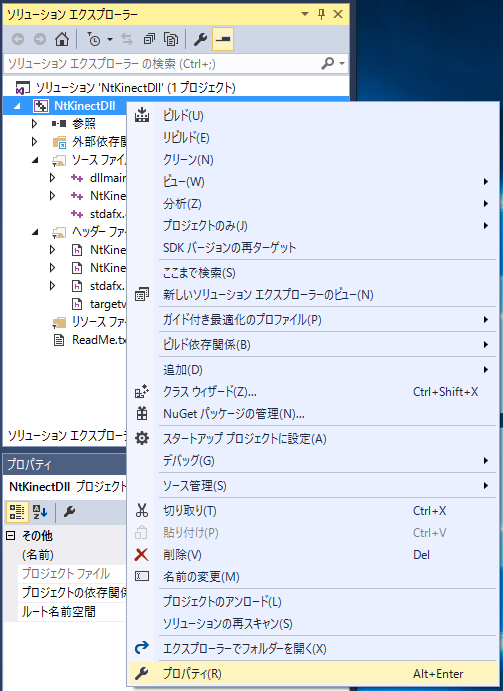
-
Make settings at the state of
Configuration: "All Configuration",
Platform: "Acvive (x64)".
By doing this, you can configure "Debug" and "Release" mode at the same time.
Of course, you can change the settings separately.
- Add the face recognition library to link.
"Configuration Properties" -> "Linker" -> "General" -> "Input"
Kinect20.Face.lib
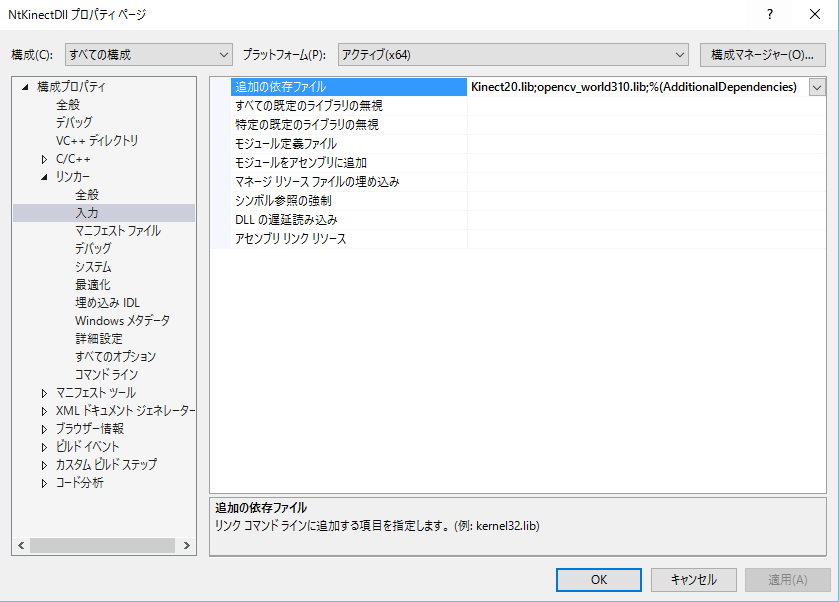
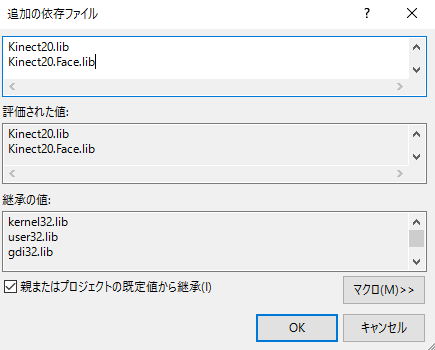
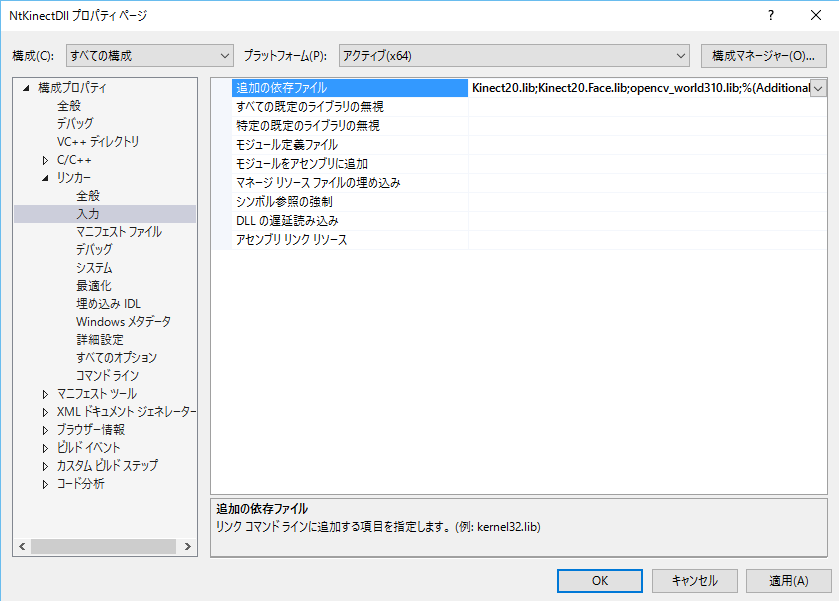
-
Write the declaration in the header file.
The name of the header file is "ProjectName.h", which is "NtKinectDll.h" in this case.
The magenta color part is the prototype declaration of the function added this time.
| NtKinectDll.h |
#ifdef NTKINECTDLL_EXPORTS
#define NTKINECTDLL_API __declspec(dllexport)
#else
#define NTKINECTDLL_API __declspec(dllimport)
#endif

extern "C" {
  NTKINECTDLL_API void* getKinect(void);
  NTKINECTDLL_API int faceDirection(void* ptr, float* dir);
}
|
-
Write the definition in "ProjectName.cpp" which is
"NtKinectDll.cpp" in this case.
At first, define USE_FACE constant before including NtKinect.h.
When you define USE_FACE, the program must be linked "Kinect20.Face.lib" library.
Then,
add the function definition of int faceDirection(void *, float *).
In this function, the image acquired by the RGB camera is reduced to 1/16,
and is displayed with cv::imshow().
On the image,
the joints are drawn in red,
and a cyan rectangle is drawn around the recognized face.
Notice that calling cv::waitKey(1) is needed
to display the OpenCV window properly.
Since the direction of the face is three float values of pitch, yaw, and roll,
and 6 people may be recognized,
so the data area should be allocated more than "sizeof(float) * 3 * 6" bytes
on the caller side.
Return value is the number of recognized faces.
| NtKinectDll.cpp |
#include "stdafx.h"
#include "NtKinectDll.h"

#define USE_FACE
#include "NtKinect.h"

using namespace std;

NTKINECTDLL_API void* getKinect(void) {
  NtKinect* kinect = new NtKinect;
  return static_cast<void*>(kinect);
}

NTKINECTDLL_API int faceDirection(void* ptr,float *dir) {
  NtKinect *kinect = static_cast<NtKinect*>(ptr);
  (*kinect).setRGB();
  (*kinect).setSkeleton();
  (*kinect).setFace();
  int scale = 4;
  cv::Mat img((*kinect).rgbImage);
  cv::resize(img,img,cv::Size(img.cols/scale,img.rows/scale),0,0);
  for (auto person: (*kinect).skeleton) {
    for (auto joint: person) {
      if (joint.TrackingState == TrackingState_NotTracked) continue;
      ColorSpacePoint cp;
      (*kinect).coordinateMapper->MapCameraPointToColorSpace(joint.Position,&cp);
      cv::rectangle(img, cv::Rect((int)cp.X/scale-2, (int)cp.Y/scale-2,4,4), cv::Scalar(0,0,255),2);
    }
  }
  for (auto r: (*kinect).faceRect) {
    cv::Rect r2(r.x/scale,r.y/scale,r.width/scale,r.height/scale);
    cv::rectangle(img, r2, cv::Scalar(255, 255, 0), 2);
  }
  cv::imshow("face",img);
  cv::waitKey(1);
  int idx=0;
  for (auto d: (*kinect).faceDirection) {
    dir[idx++] = d[0];
    dir[idx++] = d[1];
    dir[idx++] = d[2];
  }
  return (*kinect).faceDirection.size();
}
|
-
Build with "Application configuration" set to "Release".
NtKinectDll.lib and NtKinectDll.dll are generated in the folder KinectV2_dll2/x64/Release/.
[Caution](Oct/07/2017 added)
If you encounter "dllimport ..." error when building with Visual Studio 2017 Update 2,
please
refer to here
and deal with it
to define
NTKINECTDLL_EXPORTS
in NtKinectDll.cpp.
-
Please click here for this sample project NtKinectDll2.zip。
Since the above zip file may not include the latest "NtKinect.h",
Download the latest version from here
and replace old one with it.
Confirm the operation of the generated DLL file
Let's create a simple project to confirm that the generated DLL file works properly.
- Start using
the Visual Studio 2017's project
CheckDLL.zip
of
"How to make Kinect V2 program as DLL and use it from Unity" .
- Replace NtKinectDll.h in the project with a new one.
Copy the new NtKinectDll.h onto the old NtKinectDll.h in
the folder where the project source files as stdafx.cpp or CheckDLL.cpp are located.
- Replace the DLL and LIB file in the project's folder.
Copy the new NtKinectDll.dll and NtKinectDll.lib onto the old ones
the folder where the project source files as stdafx.cpp or CheckDLL.cpp are located.
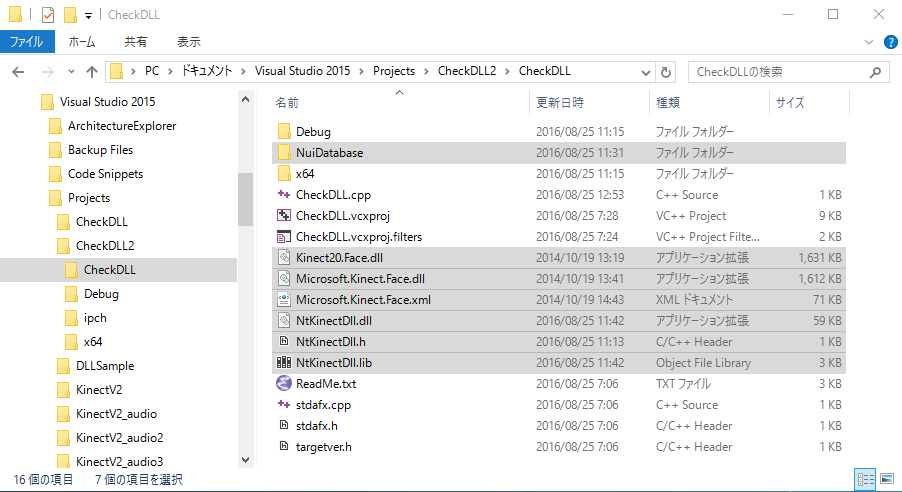
- Copy the files related to face recognition to the project folder.
Copy
all the file under the
$(KINECTSDK20_DIR)Redist\Face\x64\。
to
the folder where the project source files as stdafx.cpp or CheckDLL.cpp are located.
With the standard settings,
$(KINECTSDK20_DIR)
should be
C:\Program Files\Microsoft SDKs\Kinect\v2.0_1409\
.
("V2.0_version number" depends on the version of SDK you are using).
$(KINECTSDK20_DIR)Redist\Face\x64\NuiDatabase\
                                 \Kinect20.Face.lib
                                 \Microsoft.Kinect.Face.lib
                                 \Microsoft.Kinect.Face.xml
|
|
- Change the contents of CheckDLL.cpp as follows.
Allocate 18 float data to call faceDirection(void*,float*);.
The second argument of the function is the data area
for the face orientation up to 6 people.
| CheckDLL.cpp |
#include "stdafx.h"
#include <iostream>
#include <sstream>

#include "NtKinectDll.h"

using namespace std;

int main() {
  void* kinect = getKinect();
  float dir[6*3];
  while (1) {
    int ret = faceDirection(kinect, dir);
    if (ret) {
      for (int i=0; i<ret; i++) {
	cout << i << " pitch: " << dir[i*3+0] << "  "
	     << "yaw: " << dir[i*3+1] << "  "
	     << "roll: " << dir[i*3+2] << endl;
      }
    } else {
      cout << "unknown" << endl;
    }
  }
  return 0;
}
|
-
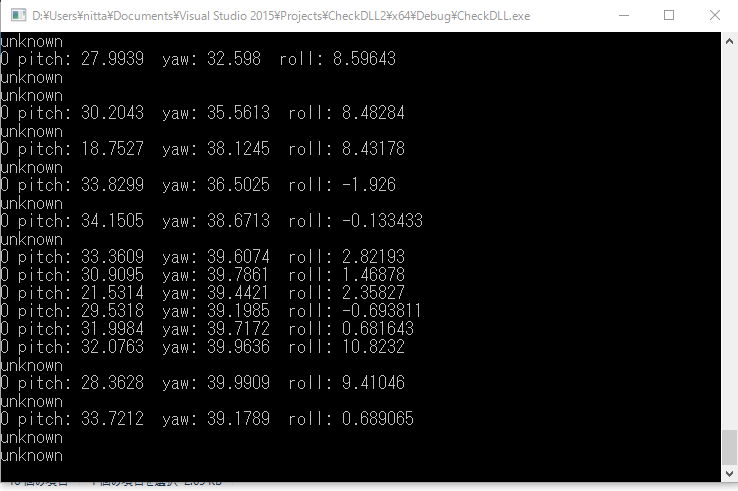
When you run the program,
the recognized face directions are displayed on the console screen.
Face can be recognized only when its skeleton is recognized.
In the rightHandState() function of the DLL,
Joints and faces are drawn with red and cyan squares on the RGB image,
and the image is displayed in a window.
You can see whether your skeleton and face is recognized or not by the window.
-
Please click hre for this sample project CheckDLL2.zip。
Use NtKinect DLL from Unity
Let's use
NtKinectDll.dll
in Unity.
-
For more details on how to use DLL with Unity, please see
the official manual
.
-
The data of Unity(C#) is managed
and the data of DLL (C++) is unmanged.
Managed means that the data is moved by the gabage collector.
Unmanaged means that the data is not moved by the gabage collector.
In order to pass data between C# and C++,
it is necessary to convert the data state.
To do this,
the functions of
System.Runtime.InteropServices.Marshal
Class in C# can be used.
-
For details on how to pass data between different languages,
refer to the
"
Interop Marshaling
"
section of the
"
Interoperating with Unmanaged Code
" at MSDN.
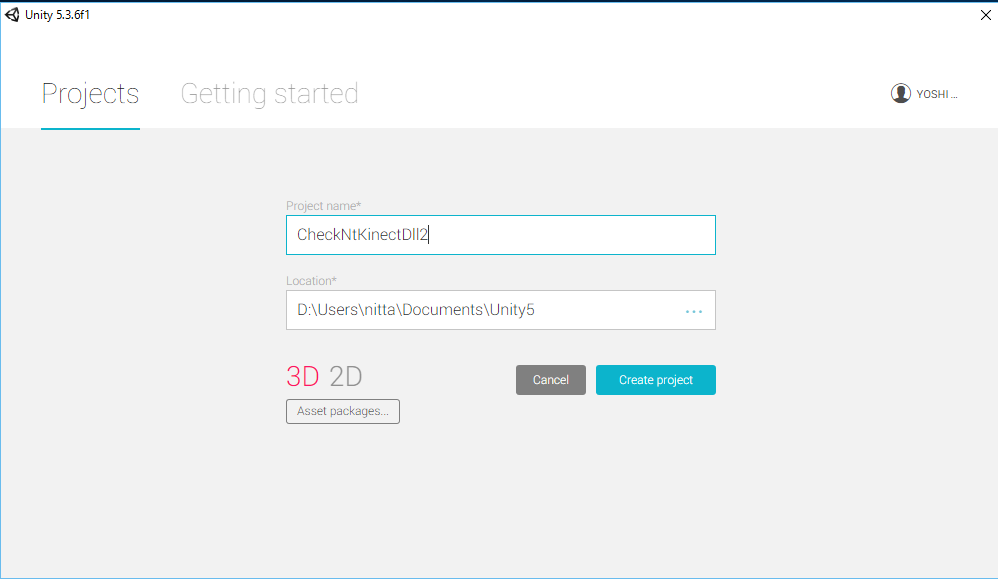
- Start a new Unity project.
-
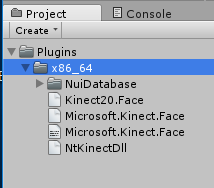
Copy
NtKinectDll.h, NtKinectDll.lib, NtKinectDll.dll
to the project folder
Assets/Plugins/x86_64/
.
And copy
all the file under the $(KINECTSDK20_DIR)Redist\Face\x64\
to the project folder
Assets/Plugins/x86_64/
.
-
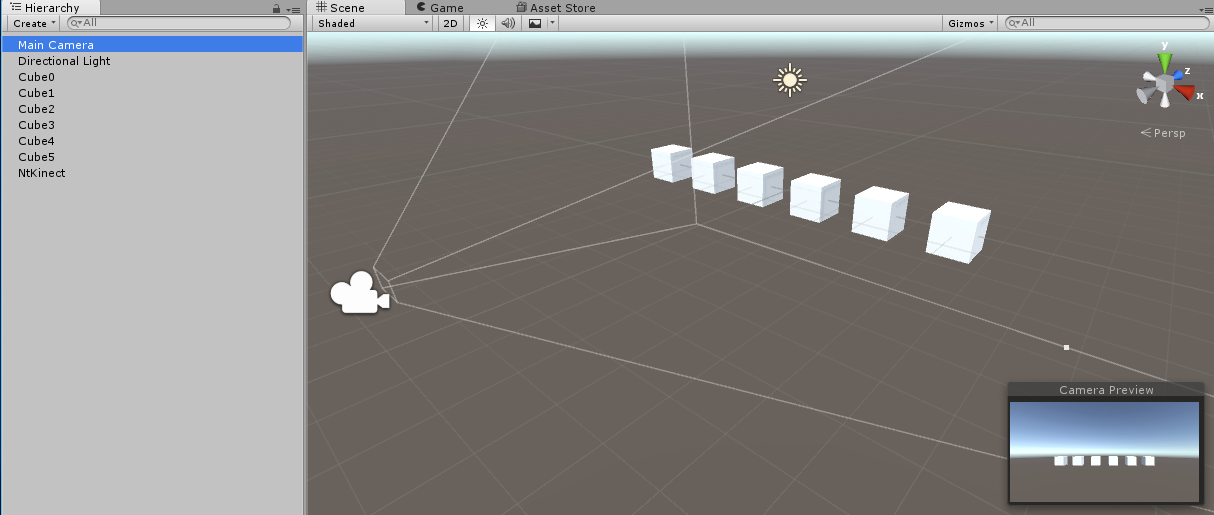
Place 6 Cubes in the scene,
change their names as "Cube 0" to "Cube 5",
and change their positions.
You can leave the default position of the camera.
From the upper menu, "Game Object"-> "3D Object" -> "Cube"
Move the 6 Cubes as follows.
There is no need to move the camera,
since the camera views all the 6 Cubes from the default position.
| name |
Position |
Rotation |
Scale |
| x |
y |
z |
x |
y |
z |
x |
y |
z |
| Cube0 |
-5 |
0 |
0 |
0 |
0 |
0 |
1 |
1 |
1 |
| Cube1 |
-3 |
0 |
0 |
0 |
0 |
0 |
1 |
1 |
1 |
| Cube2 |
-1 |
0 |
0 |
0 |
0 |
0 |
1 |
1 |
1 |
| Cube3 |
1 |
0 |
0 |
0 |
0 |
0 |
1 |
1 |
1 |
| Cube4 |
3 |
0 |
0 |
0 |
0 |
0 |
1 |
1 |
1 |
| Cube5 |
5 |
0 |
0 |
0 |
0 |
0 |
1 |
1 |
1 |
| Main Camera |
0 |
1 |
-10 |
0 |
0 |
0 |
1 |
1 |
1 |
- Place the Empty Object in the scene,
and change its name to NtKinect.
- Create C# script under the Project's Assets/Scripts/
From the top menu, "Assets"-> "Create" -> "C# Script" -> Filename is "NtKinectBehaviour"
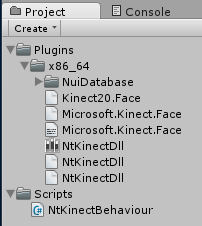
The pointers in C++ are treated as System.IntPtr in C#.
| NtKinectBehaviour.cs |
using UnityEngine;
using System.Collections;
using System.Runtime.InteropServices;

public class NtKinectBehaviour : MonoBehaviour {
    [DllImport ("NtKinectDll")] private static extern System.IntPtr getKinect();
    [DllImport ("NtKinectDll")] private static extern int rightHandState(System.IntPtr kinect);
    [DllImport ("NtKinectDll")] private static extern int faceDirection(System.IntPtr kinect, System.IntPtr data);

    private System.IntPtr kinect;
    int bodyCount = 6;
    GameObject[] obj;
    int counter;

    void Start () {
        kinect = getKinect();
	obj = new GameObject[bodyCount];
	obj[0] = GameObject.Find("Cube0");
	obj[1] = GameObject.Find("Cube1");
	obj[2] = GameObject.Find("Cube2");
	obj[3] = GameObject.Find("Cube3");
	obj[4] = GameObject.Find("Cube4");
	obj[5] = GameObject.Find("Cube5");
    }
    public static Quaternion ToQ (float pitch, float yaw, float roll) {
	yaw *= Mathf.Deg2Rad;
	pitch *= Mathf.Deg2Rad;
	roll *= Mathf.Deg2Rad;
	float rollOver2 = roll * 0.5f;
	float sinRollOver2 = (float)System.Math.Sin ((double)rollOver2);
	float cosRollOver2 = (float)System.Math.Cos ((double)rollOver2);
	float pitchOver2 = pitch * 0.5f;
	float sinPitchOver2 = (float)System.Math.Sin ((double)pitchOver2);
	float cosPitchOver2 = (float)System.Math.Cos ((double)pitchOver2);
	float yawOver2 = yaw * 0.5f;
	float sinYawOver2 = (float)System.Math.Sin ((double)yawOver2);
	float cosYawOver2 = (float)System.Math.Cos ((double)yawOver2);
	Quaternion result;
	result.w = cosYawOver2 * cosPitchOver2 * cosRollOver2 + sinYawOver2 * sinPitchOver2 * sinRollOver2;
	result.x = cosYawOver2 * sinPitchOver2 * cosRollOver2 + sinYawOver2 * cosPitchOver2 * sinRollOver2;
	result.y = sinYawOver2 * cosPitchOver2 * cosRollOver2 - cosYawOver2 * sinPitchOver2 * sinRollOver2;
	result.z = cosYawOver2 * cosPitchOver2 * sinRollOver2 - sinYawOver2 * sinPitchOver2 * cosRollOver2;
	return result;
    }

    void Update () {
	float[] data = new float[bodyCount * 3];
	GCHandle gch = GCHandle.Alloc(data,GCHandleType.Pinned);
	int n = faceDirection(kinect,gch.AddrOfPinnedObject());
	gch.Free();
	counter = (n != 0) ? 10 : System.Math.Max(0,counter-1);
	for (int i=0; i<bodyCount; i++) {
	    if (i<n) {
		obj[i].transform.rotation = ToQ(data[i*3+0],data[i*3+1],data[i*3+2]);
		obj[i].GetComponent<Renderer>().material.color = new Color(1.0f,0.0f,0.0f,1.0f);
	    } else if (counter == 0) {
		obj[i].transform.rotation = Quaternion.identity;
		obj[i].GetComponent<Renderer>().material.color = new Color(1.0f,1.0f,1.0f,1.0f);
	    }
	}
    }
}
|
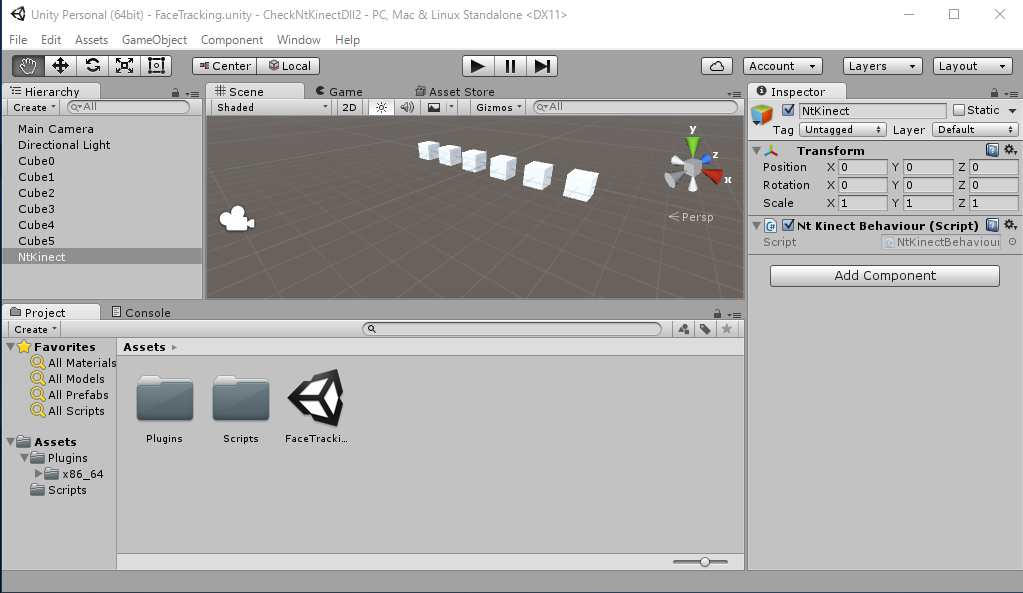
- Add "NtKinectBehaviour.cs" script to "NtKinect" as a Component.
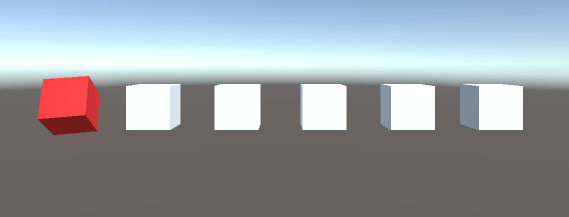
- When you run the program,
as many cubes as the number of recognized faces turn red and rotate
according to the face directions. Exit with 'q' key.
Even if the face is being recognized,
it often happens that face recognition fails momentaly.
In such a case the cube moves severely and it is difficult to see,
so we are doing a simple error handling to make tracking failure
only when the recognition fails ten consecutive times (with the variable counter ).
To handle correctly, we should receive
faceTrackingId and judge for each face,
but I keep it simple way to avoid complicated explanation code.
[Notice]
We generates an OpenCV window in DLL to display the skeleton recognition state.
Note that when the OpenCV window is focused,
that is,
when the Unity game window is not focused,
the screen of Unity will not change.
Click on the top of Unity's window and make it focused,
then try the program's behaviour.
- Please click here for this Unity sample project CheckNtKinectDll2.zip。

http://nw.tsuda.ac.jp/


